 RTC
RTC
 BLK360
 BLK2GO
 BLK ARC
 BLK2FLY
 BLK3D
BLK3D
 Accessories

POST ONE | POST TWO | POST THREE | POST FOUR

Kyle Barker has more than ten years experience as an architect and designer. His expertise includes architecture, interior design & graphic design. He has worked on multi-family housing, commercial & institutional work, and publications. As a Project Architect at Merge Architects, Kyle is applying 3D laser scanning to capture existing conditions and increase the accuracy of the firm’s drawing sets.
Prior to joining Merge, Kyle was a designer & project manager at MASS Design Group where he led projects in the US and Rwanda. Before that, he was a Designer at Kennedy and Violich Architecture, where he was the team lead for Soft City, the firm’s entry in Ecological Urbanism at Harvard’s Graduate School of Design.
Kyle is a member of the American Institute of Architects and the Boston Society of Architects. He earned a Master of Architecture degree from MIT and a Bachelor of Science degree in Interior Design from the University of Cincinnati. He has taught at MIT and the Boston Architectural College and served on juries for Architizer and the Boston Society of Architects.

Post ONE:
Architect Kyle Barker meets the BLK360
Getting Started
I’m very excited to get started with the BLK360, Leica’s first lightweight imaging laser scanner. I’m hoping my computer, a 2014 Macbook Pro with Bootcamp, can keep up with the data!
Impact on the AEC Industry
My goal for working with the BLK360 is to use it as a tool to simplify the process of verifying the existing conditions at the outset of a project. I’m looking for something that saves me time and gives me peace of mind. (I’m sure you’ve had the experience of missing a critical dimension, but only realizing it after you’ve driven or flown back to your office).
It feels like every year, our clients are pushing us to accelerate our project schedules. Having a tool that would both expedite the process and increase the accuracy of documenting site conditions would have a huge impact on our industry. Speeding up some of the time-intensive aspects of the information gathering phase would allow us to spend more time on the part all architect’s love: the design.
One of the aspects of architecture that I love is the diversity of skills an architect has to learn in order to stay relevant. In the span of a few decades the field has gone from hand-drafting, to computer-aided drafting, to building-information modeling. Each of these transitions represents a new set of hard skills to master and, perhaps more significantly, a new conceptual framework through which to view the creation of architecture. I see the BLK360 as a tool that’s likely a part of the next paradigm shift in architecture, which at this point, I can only imagine.
The Future!
Like any new technology, I’m sure there will be a learning curve, but I look forward to sharing my experiences, frustrations, tips and progress in working with the BLK360 and the point cloud data. My first post will be about using it to scan a commercial interior, but I welcome any questions, thoughts and ideas for upcoming scan suggestions!
Post TWO:
Scanning a Commercial Space
My First Scan
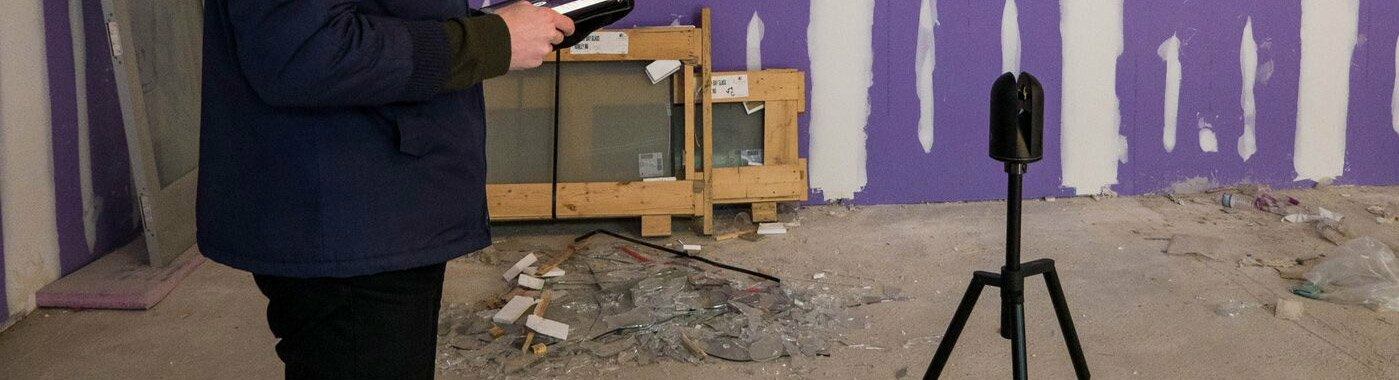
My first time working with the BLK360 on site was fun. The entire visit took less than an hour! Typically, I’d go there with my measuring tape and laser, a print out of the space, a camera, and one of the interns. We’d stress out for about two hours to make sure that we captured everything, but then we’d get back to the office, begin drawing the space, and realize that we missed a critical dimension (and would then spend the rest of the afternoon trying to remember trig and crossing our fingers). This time, I only needed to take six scans total, which was a pleasant surprise. I did four inside the space, one in the doorway and one from the outside. It was interesting that in the outdoor scan, the BLK360 captured the neighboring buildings, which was kind of incredible because some of them were about 100 feet away!
The Space
For my first time scanning, I wanted to start with something small. I had just started a new job with a young retailer in the midst of a national rollout, who had a 1,200 square foot storefront with 20-foot ceilings.
Because it was my first time using the BLK360, I wasn’t sure how many scans I would need to take, if it would be able to capture the height of the space, and if there would be adequate light (the space didn’t have any lights yet, and the windows were temporarily blacked out).
The Nitty Gritty
Once I pressed the button on the iPad to initiate the scan, the BLK 360 did a spin to capture the HDR photos. I used HDR since the space was so dark. It took longer than the standard setting would have, but it was worth it because it captured the detail of the space. Next it did another, faster spin to capture the point cloud scan. Once it had done that, the iPad notified me that the scan was finished and was being transferred to the iPad. At this point, I was able to relocate the scanner, and start the next scan.
While the BLK360 was working on the second scan, I was able to view the previous scan. As I scanned more locations, it stitched them together so that I could start to gain a picture of the overall space. At any point you can either view the space from the scanner’s point of view, or you can view it as a plan. I find the plan view helpful for determining overall coverage. As I had pointed out in my previous post, this workflow is amazing because it removes the “did I get everything?” worry from the site visit. It also lets you pull dimensions and leave location specific text notes in the file, which I found helpful in communicating with my team and as general reminders.
Next Post
Next time I’ll talk about my experience indexing the scan and bringing it into Revit to build the base model.
In my last post I mentioned that this post would discuss importing the scan into Revit but you’ll have to wait until next time to hear that story. I got a little caught up exploring the scan within ReCap Pro and wanted to share that experience with you instead.
Post THREE:
Using Data in ReCap Pro
Indexing the Scan
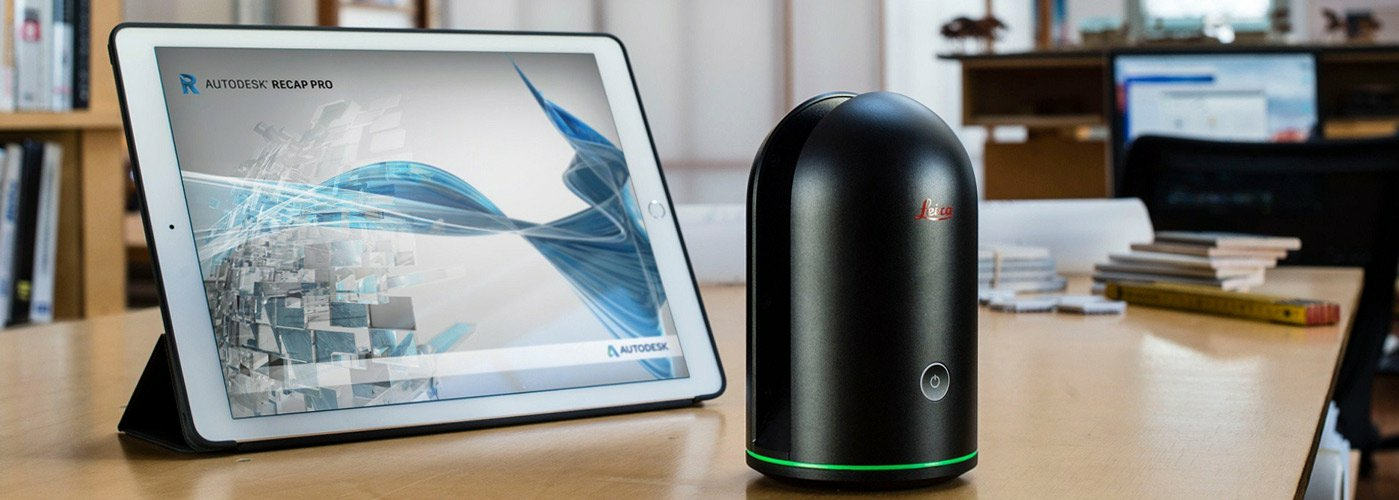
When I got back to the office I transferred the scans from my iPad to my computer via Autodesk ReCap Pro. The process is actually pretty simple. Check out the step-by-step guide.
How to Get Started with Autodesk ReCap Pro
1. Launch Autodesk ReCap Pro**
2. Connect iPad to computer using thunderbolt cable.
3. In ReCap Pro, select "New Project"
4. Then select "Transfer from Mobile Device"
5. If there are multiple projects on your iPad, select the one you’d like to import.
6. After the files have finished downloading to your computer, select “Index Scans”
7. Save the project as a .rcp file (this will allow you to open it in Revit)
**One important note! iTunes needs to be installed on your computer for this to work.
Using ReCap Pro
If you're familiar with other Autodesk products, ReCap Pro's interface will look familiar. For example, you can use the “view cube” to spin your scan around, see it in a plan view, or look at it elevationally. One thing that was intuitive, but new to me, was that it uses “tiles”— clickable icons that categorize functions — rather than the “ribbon” that Revit uses. I won’t go through all of the features, but I found the following particularly useful, which I’ve grouped by title:
Display Settings
- Color Mode
- RGB: In addition to the photo imagery the BLK360 takes ("RGB"), you can view your data as a heat map to highlight different types of information.
- Elevation: "Elevation" illustrates the height above grade via a gradient.
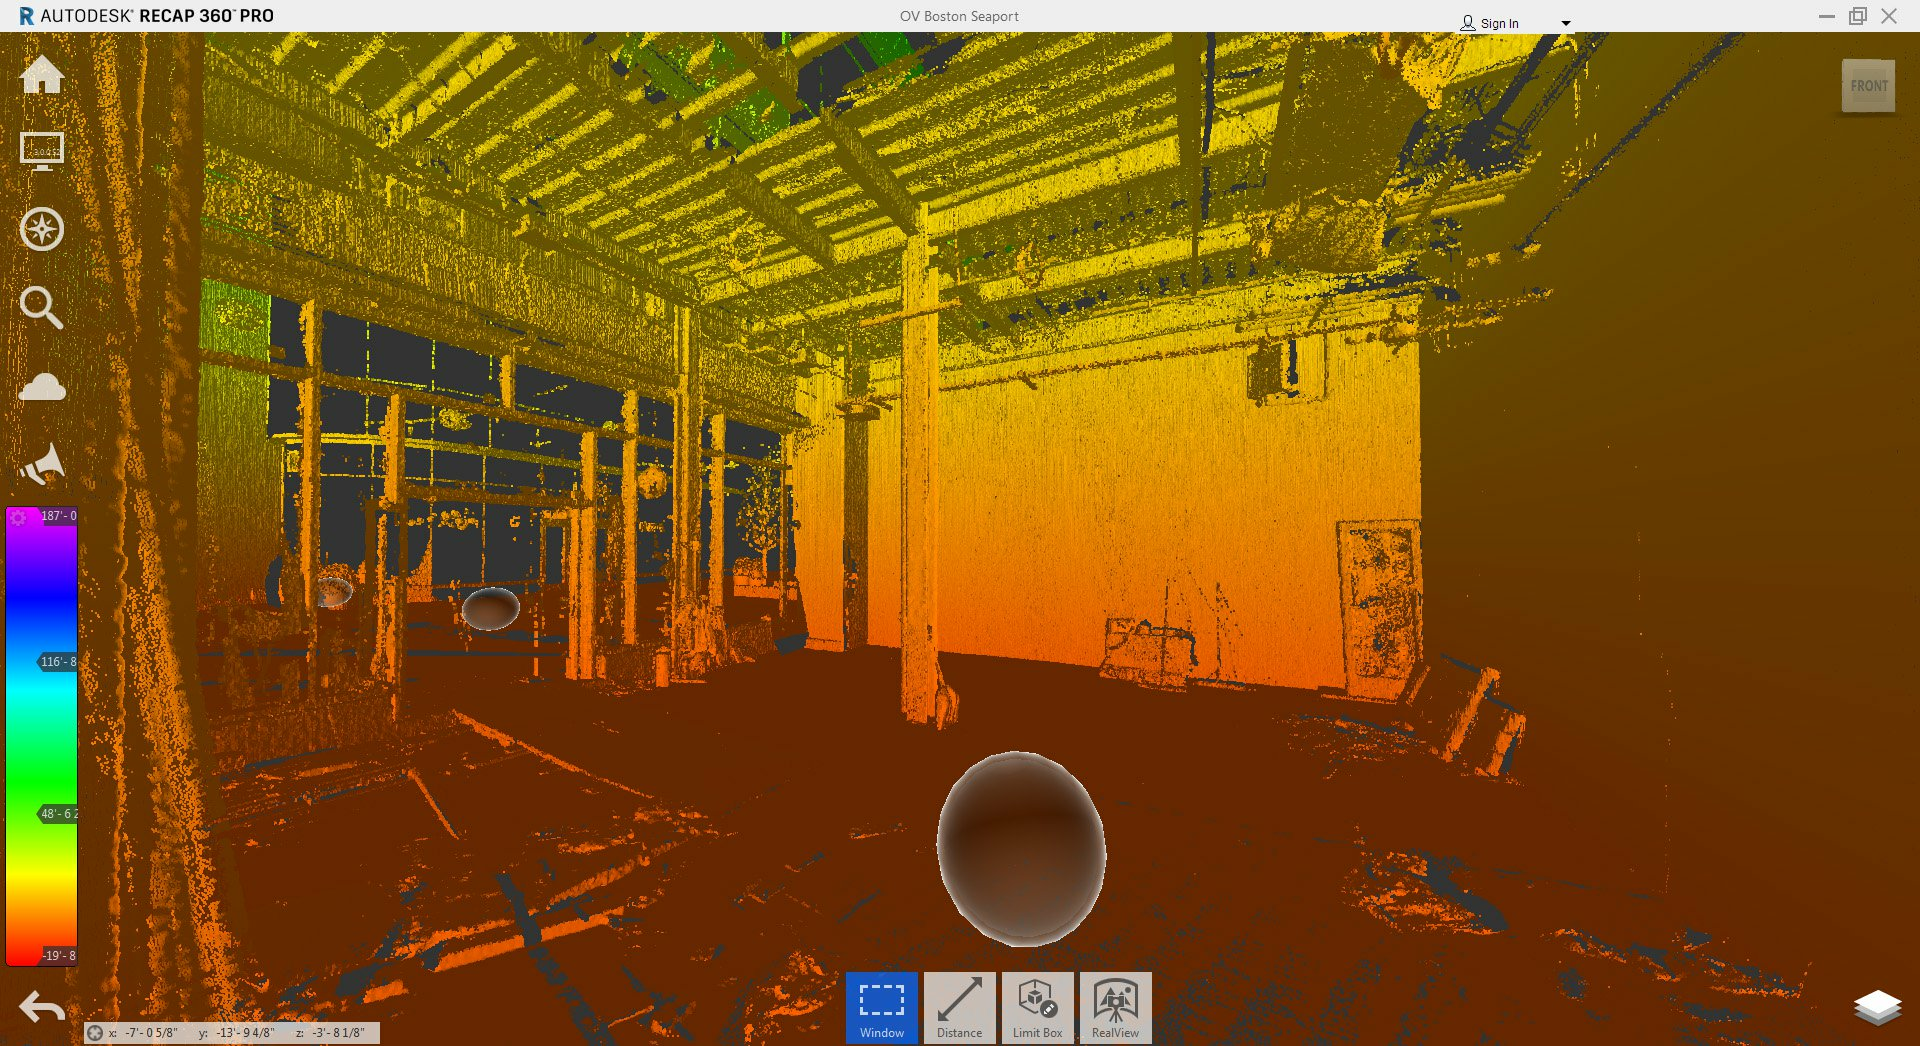
- Intensity: "Intensity" shows the quality of the scan information captured at a given point. It's also insanely beautiful, and impressive to both clients and your colleagues.
- Toggle UI Elements
- Mirror Balls: By default, scan locations show up as "mirror balls". Generally these are helpful because they allow you to quickly click into a scan and view the high quality imagery you've captured. Sometimes however, you'll want to turn them off so that you can export a clean view of your project; this allows for that.
- Annotation: If you take measurements with the “Distance” tool, this allows you to toggle them off.
- Perspective: This button allows you to toggle from a perspectival view to a parallel projection view: very helpful when you’re capturing plan or elevation imagery!
- Navigation: If you’re having trouble flying around your model with the mouse commands or the view cube, this menu will help you. It allows you to isolate the movement to one mode at a time: panning, orbiting, “looking” or “flying.” I found this helpful, and who doesn’t like to fly around their model every now and then?

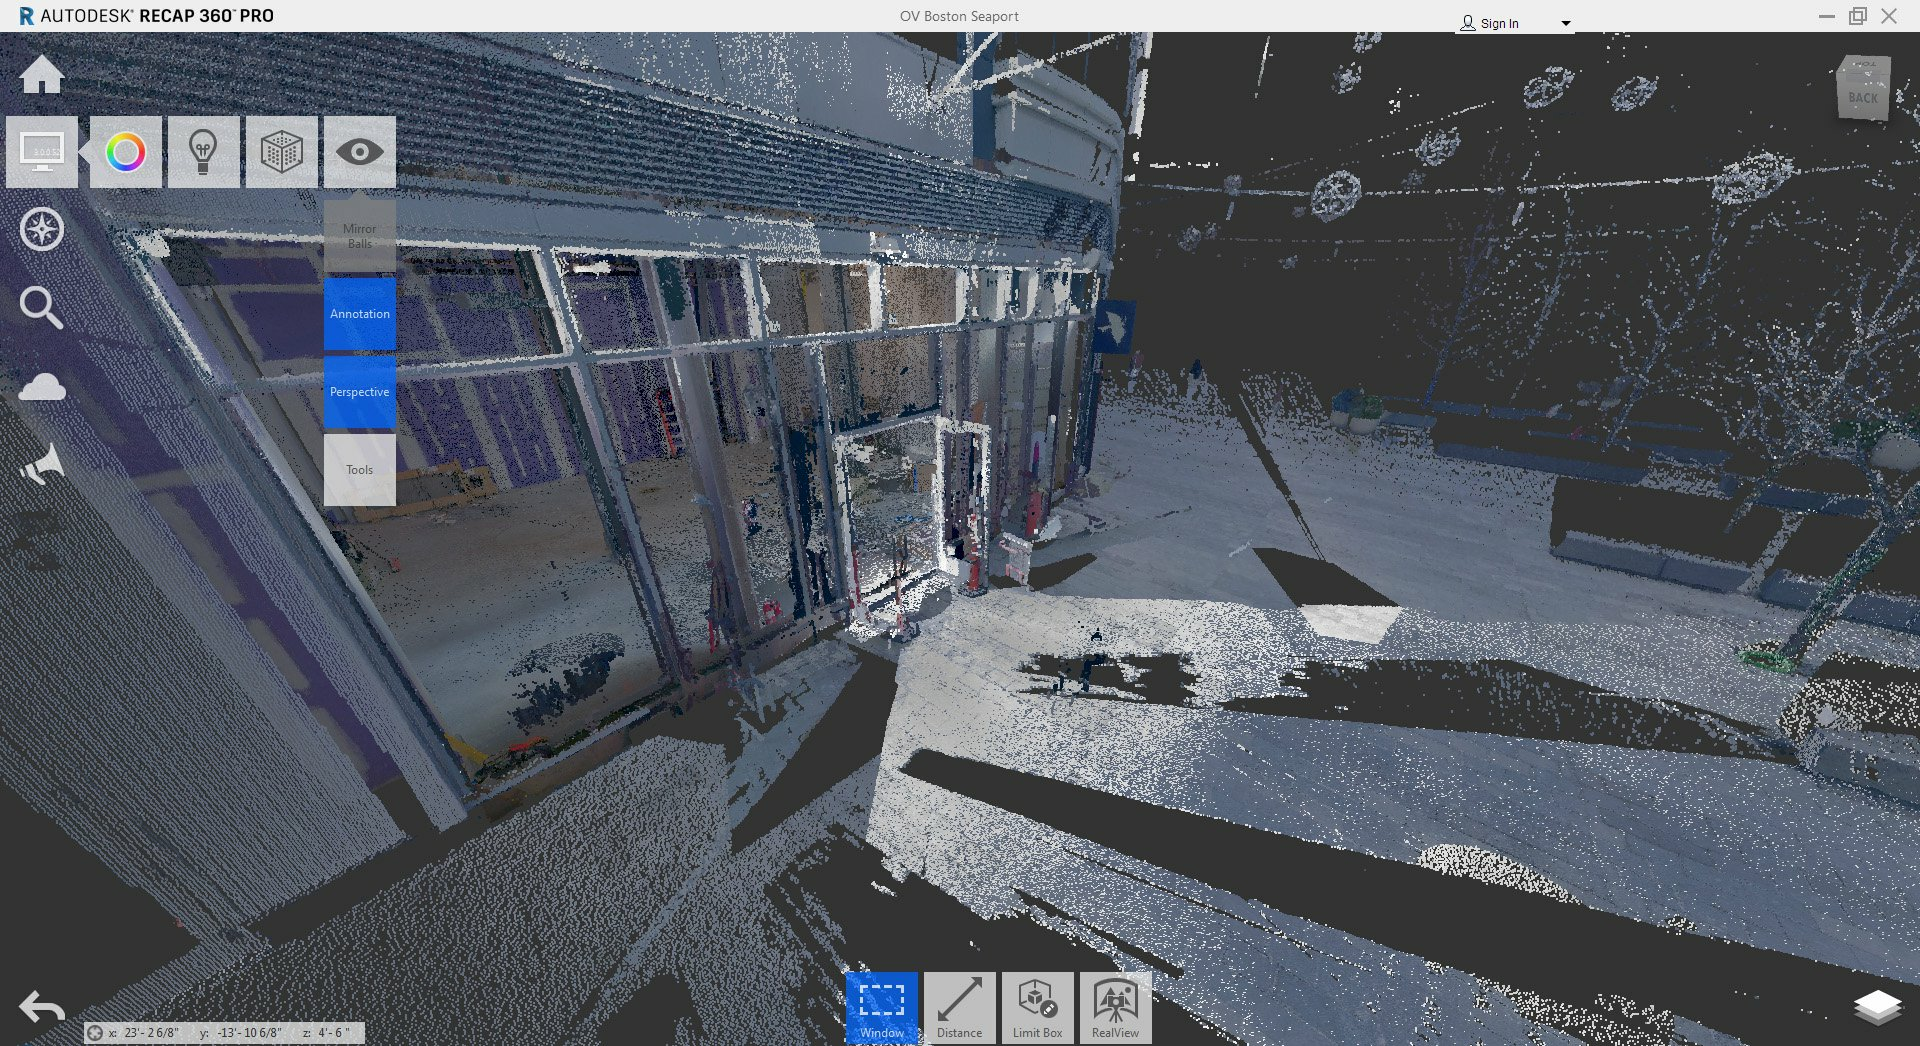
A typical view of the point cloud: note the “View Cube” in the top right corner
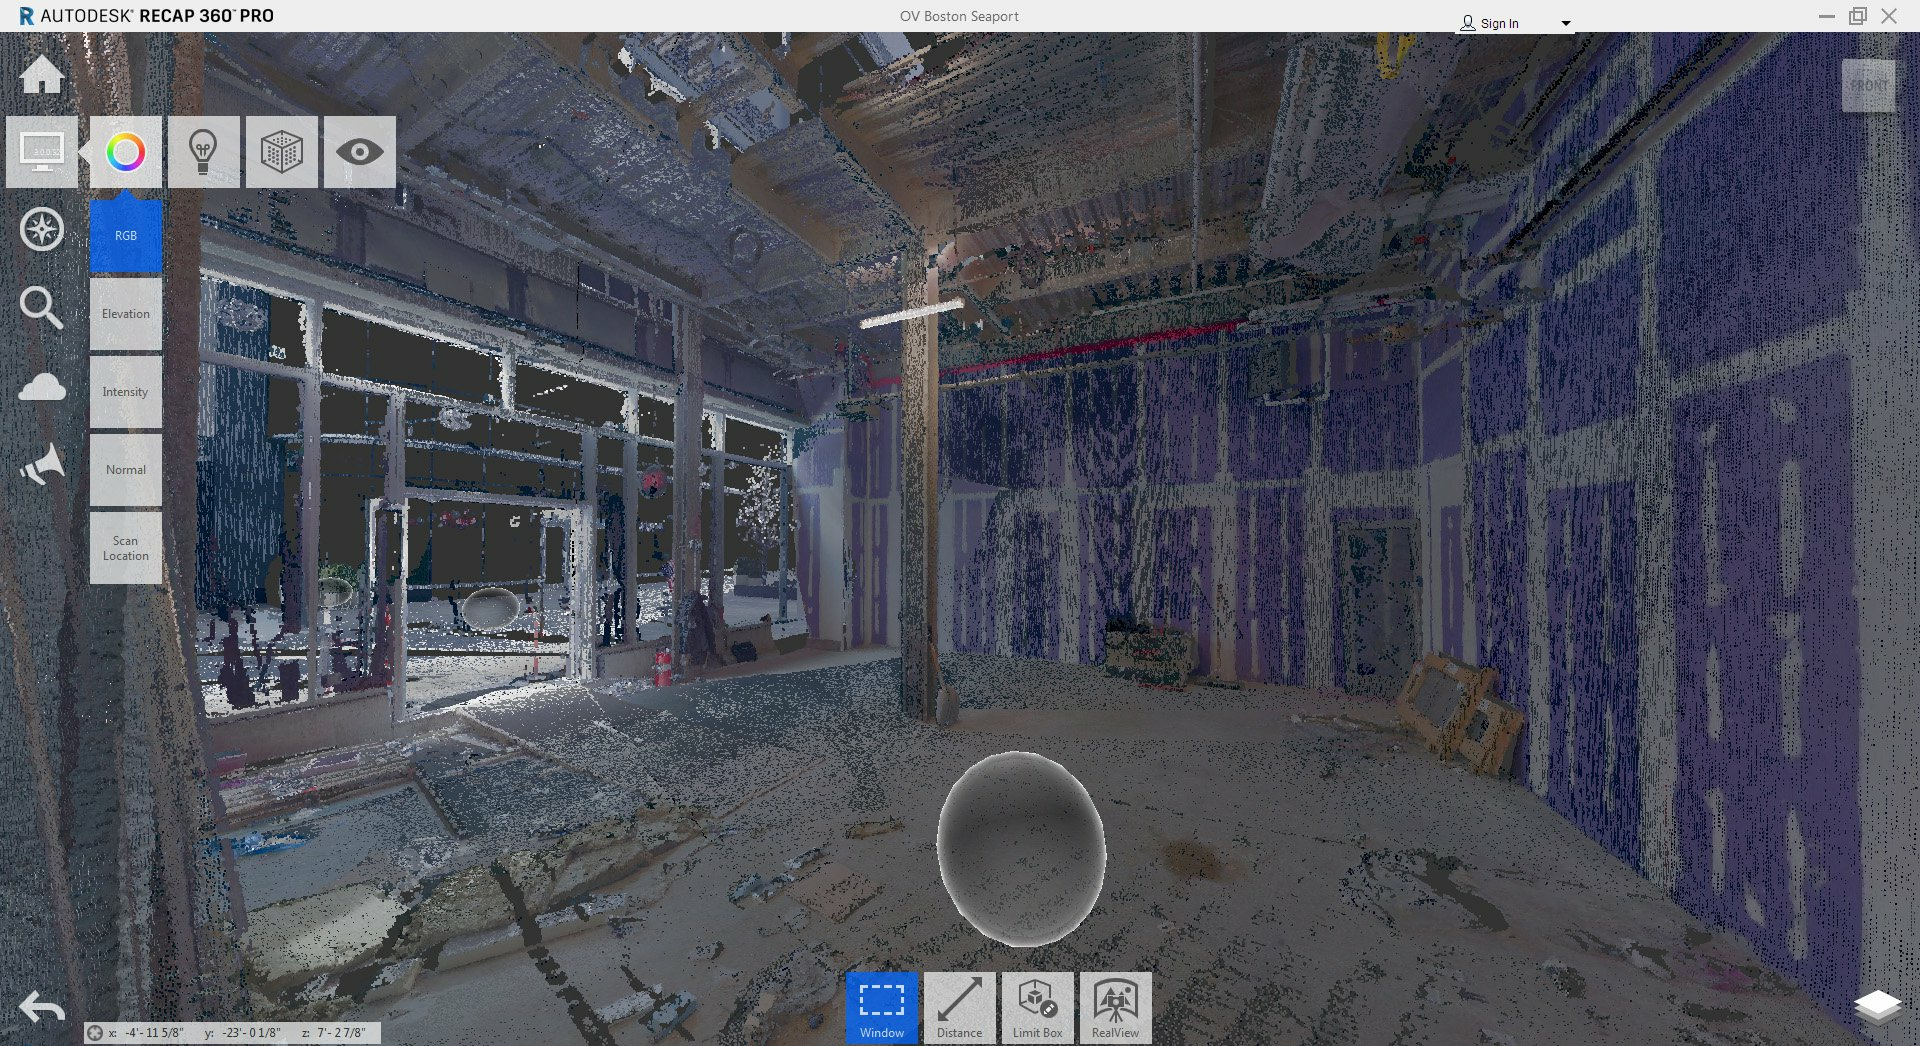
The tiles are used to access ReCap Pro’s tools & settings
Elevation view shows the height of the captured points

Intensity view shows the quality of the capture
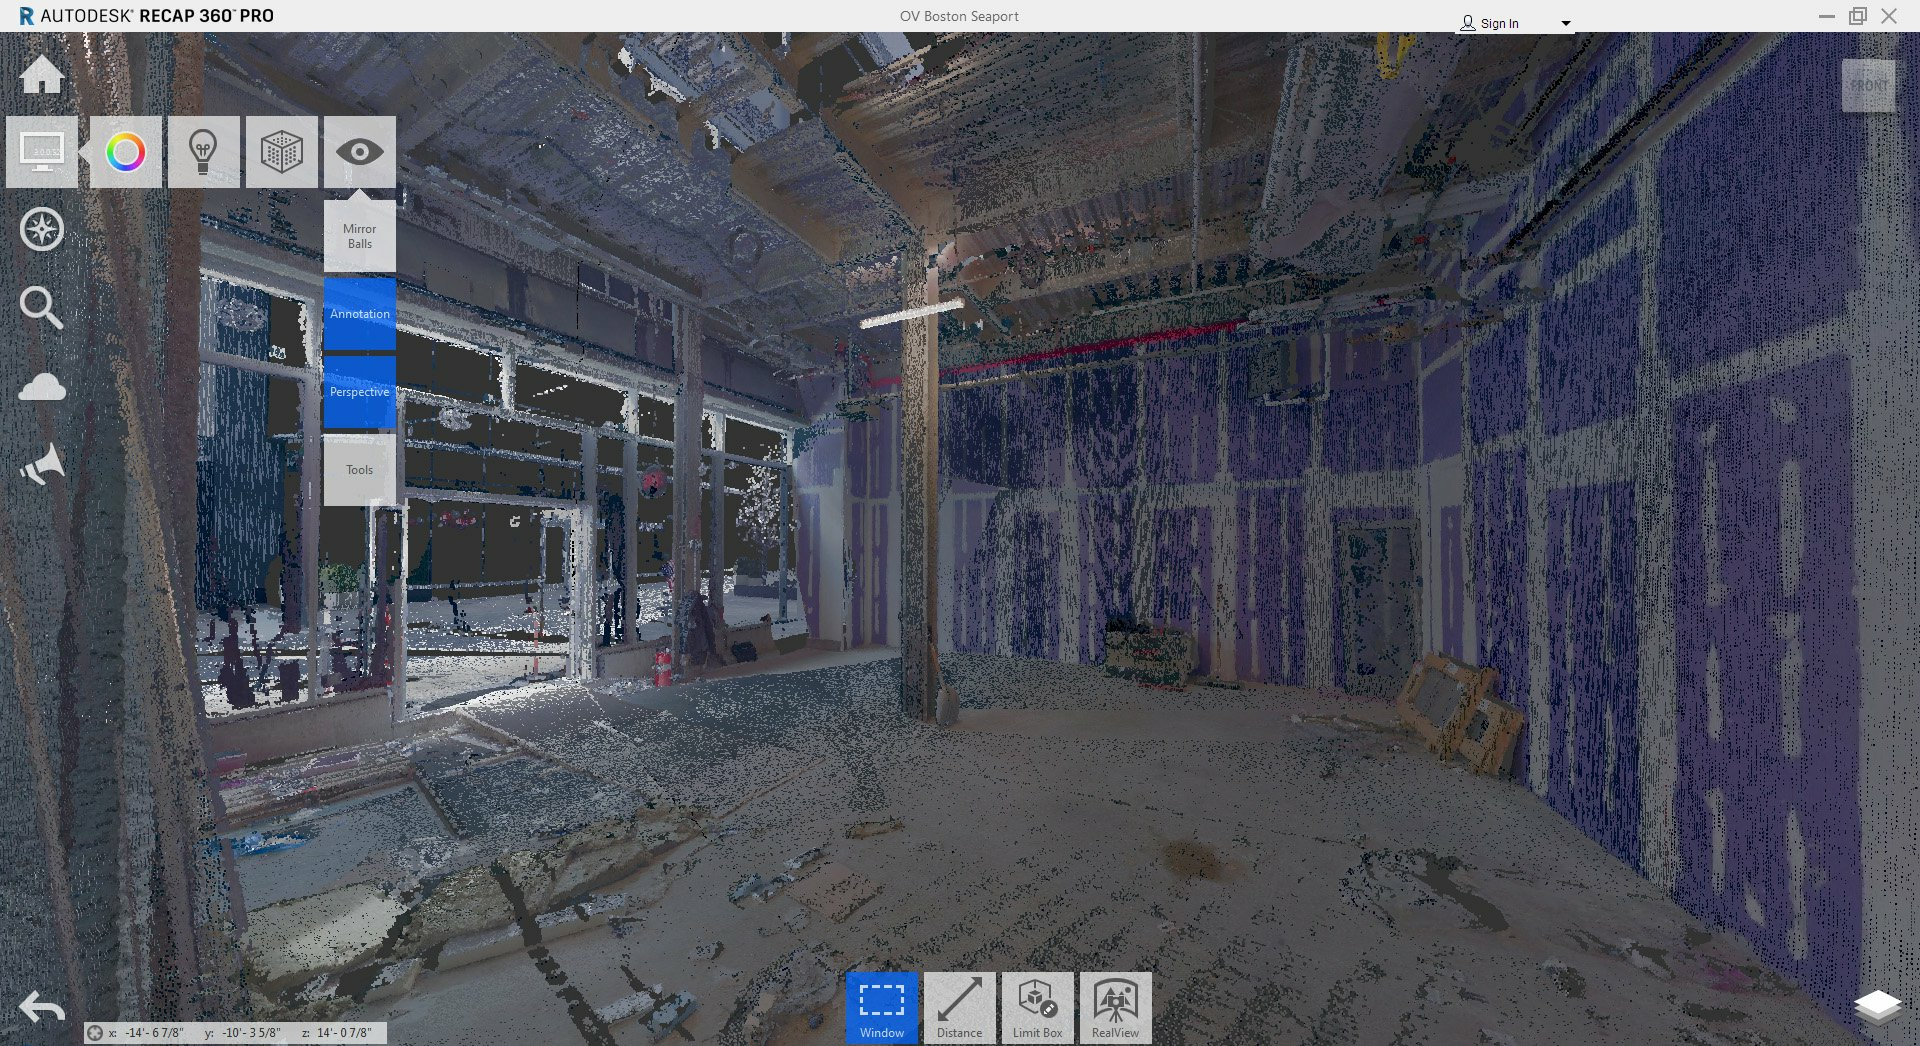
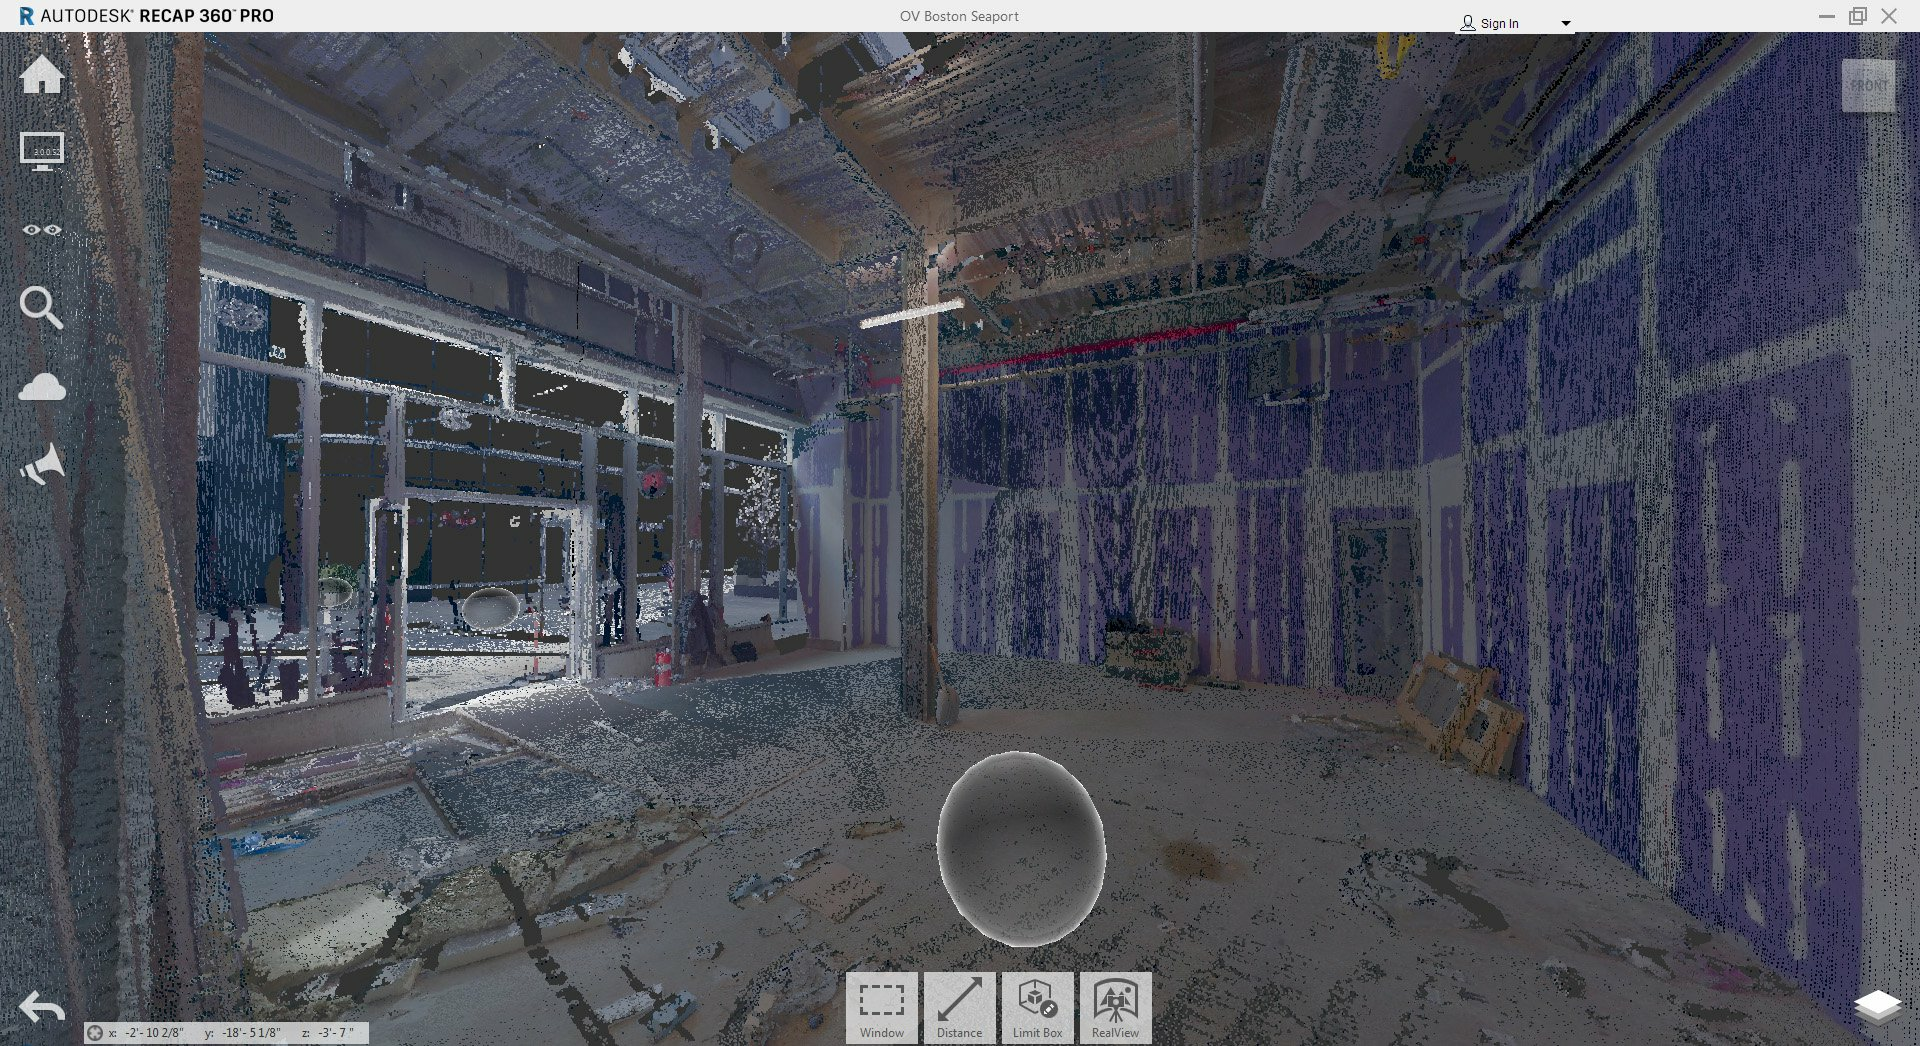
The “mirror balls” can be turned off
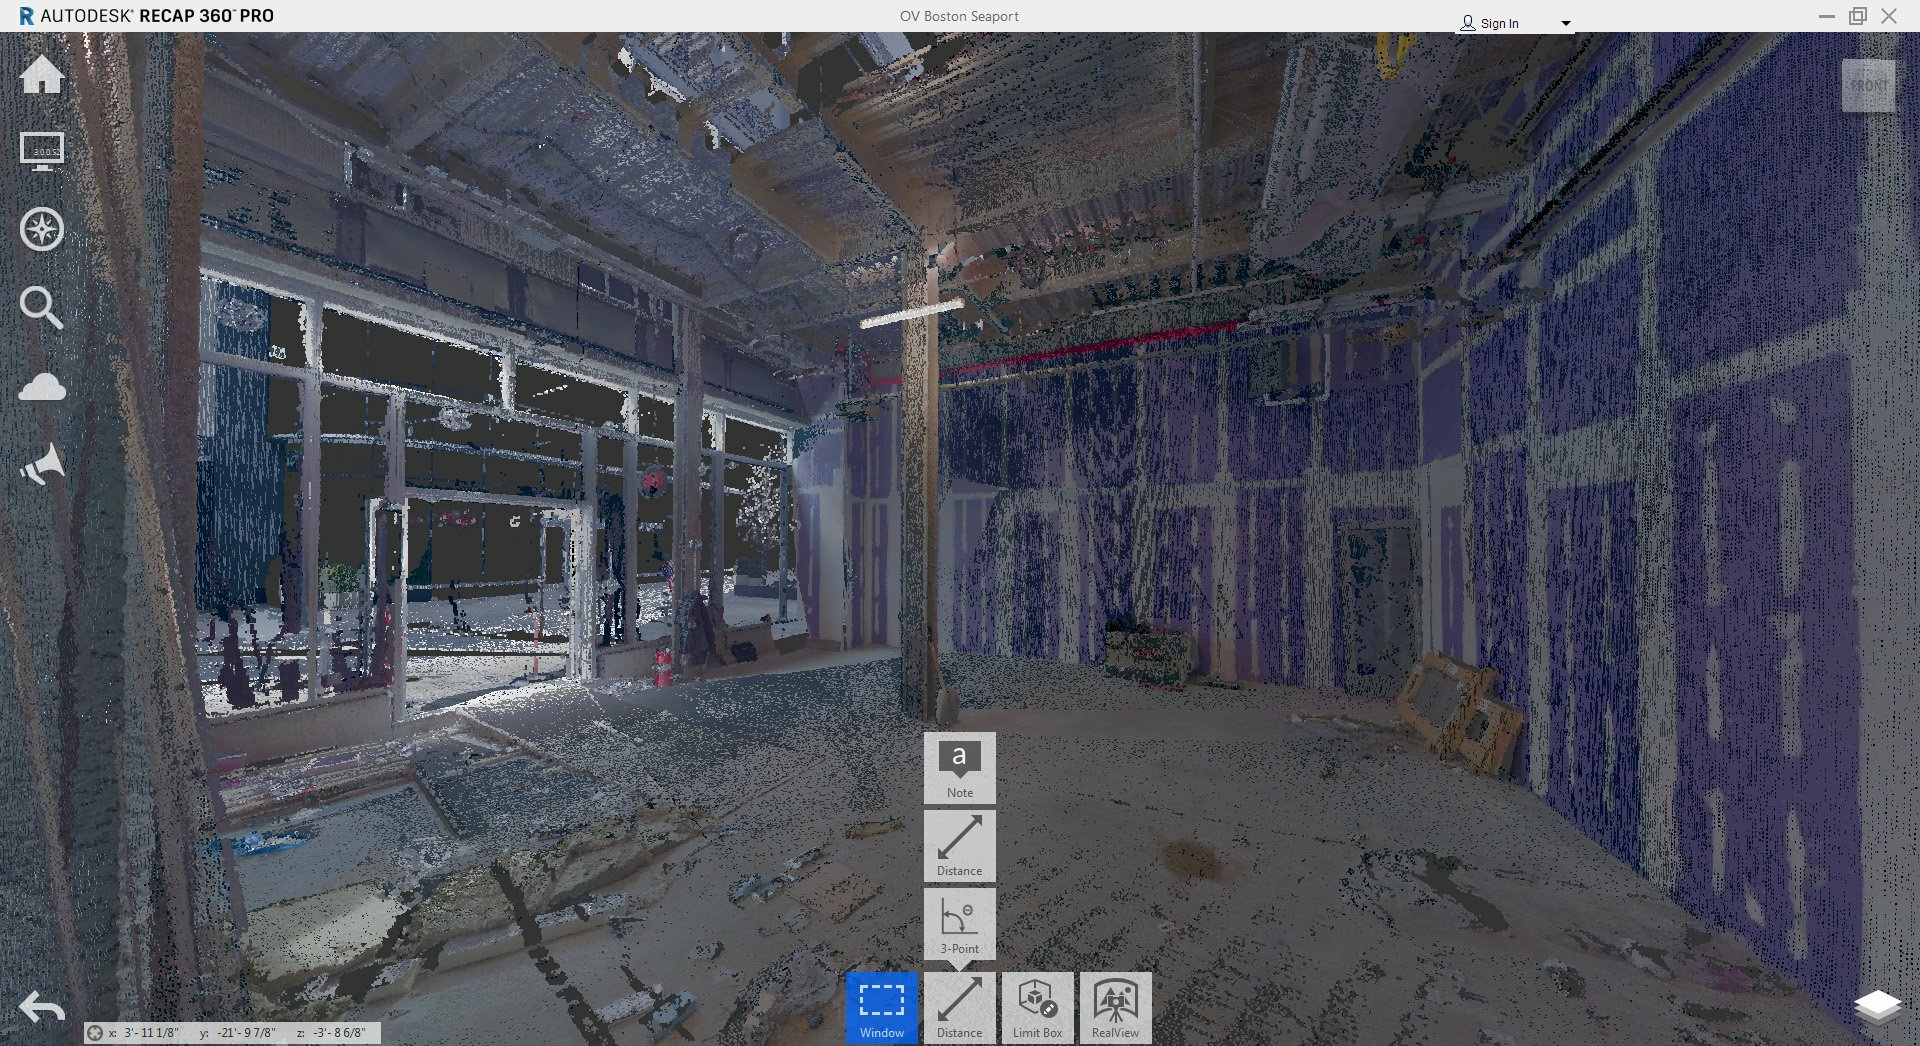
The dimension and limit box tools can be found in the contextual menu at the bottom

The dimension and limit box tools can be found in the contextual menu at the bottom
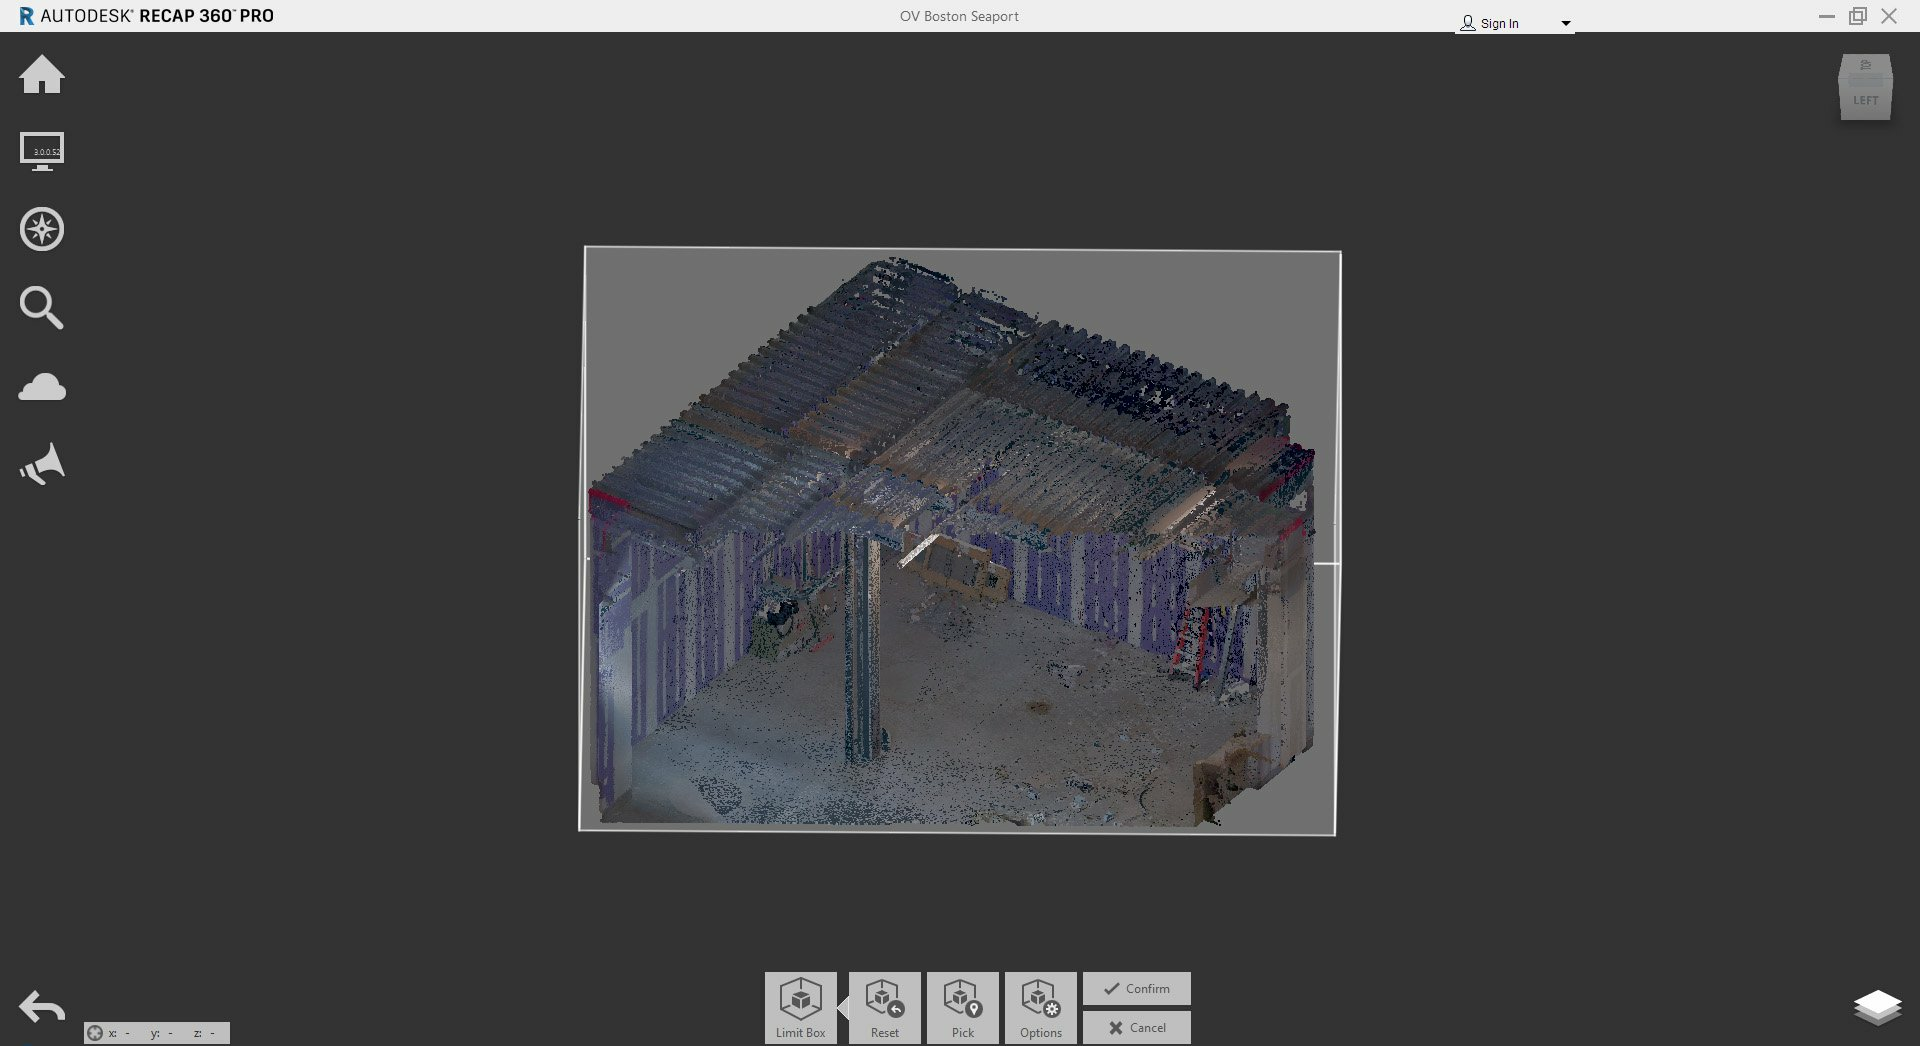
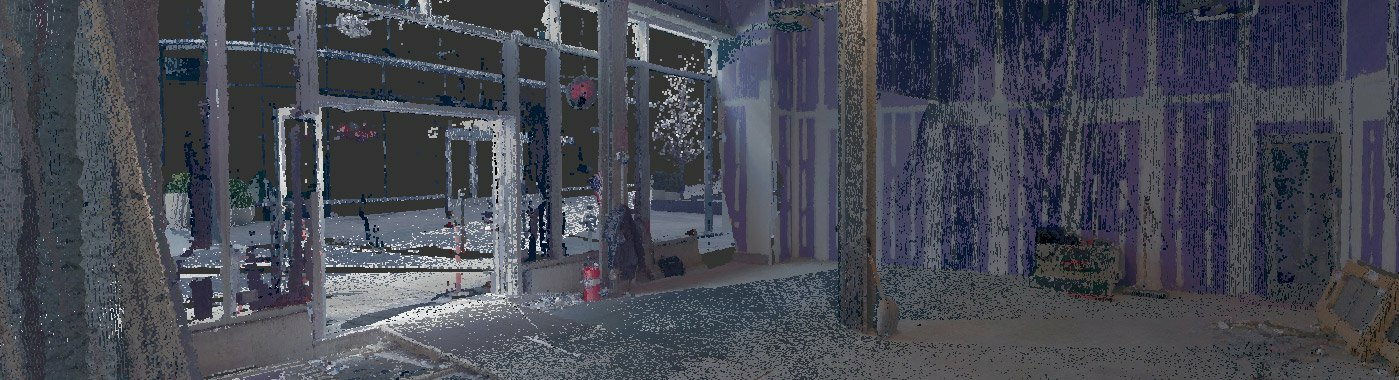
A clip of the model taken with the Limit Box
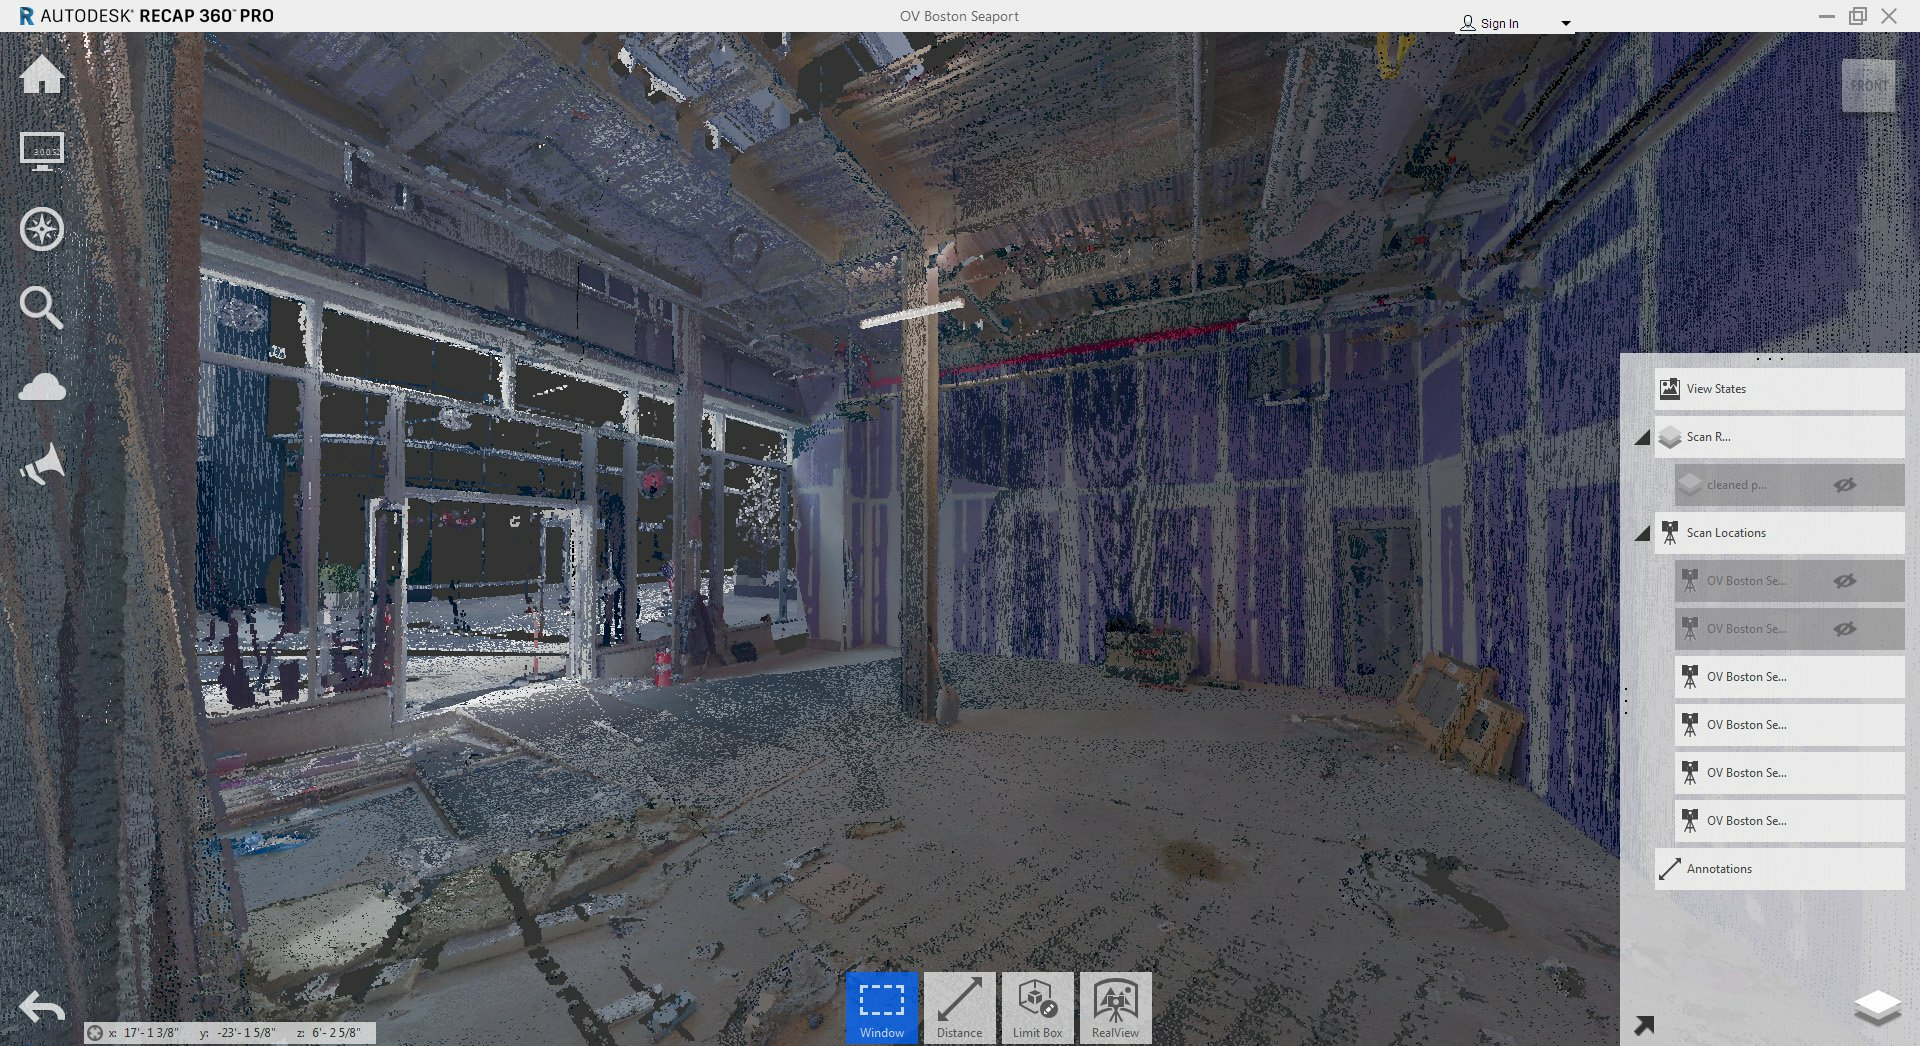
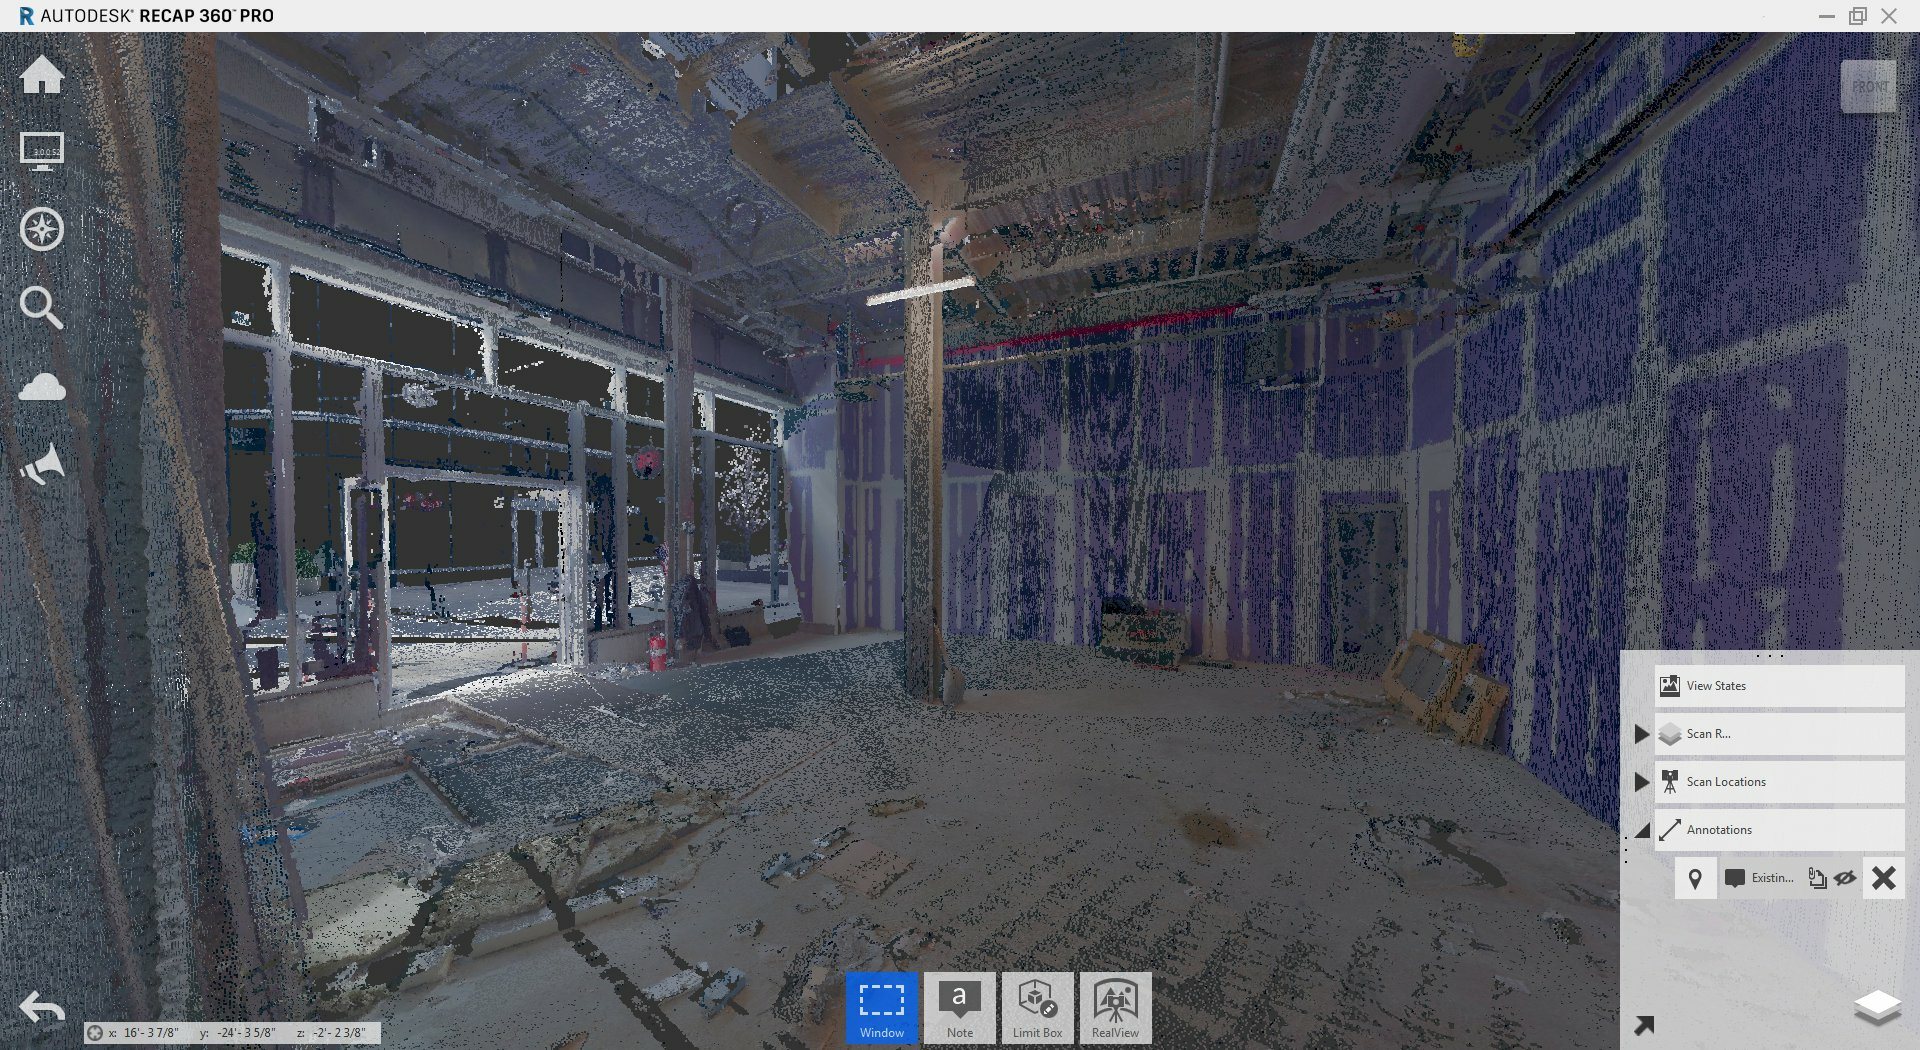
The project navigator shows each scan and any annotations that have been taken

A view of the model in parallel projection
The same view of the model in perspective mode
Like Revit, ReCap Pro has a contextual menu at the bottom of the screen, which changes based on the tools that you’re currently using. This is where you’ll find the “Dimension” tool. It is also home to the “Limit Box” which is ReCap Pro’s version of Revit’s “Section Box”. This allows you to set a limit box, adjust it, or reset it. I found this helpful for two reasons. First, it allows you to see your model in the way that Architects like looking at spaces: as plan and section cuts. Second, I found that when I reduced the amount of point cloud data on my screen, my (old) computer ran faster.
The first time I used ReCap Pro I didn’t notice the “Project Navigator” in the lower right-hand corner. This is analogous to a layer manager: it allows you to turn on and off individual scans. This is particularly helpful when cleaning up the scans that you’ve taken.
Next Post
Next time I’ll talk about Recap Pro’s dimension and annotation tools.
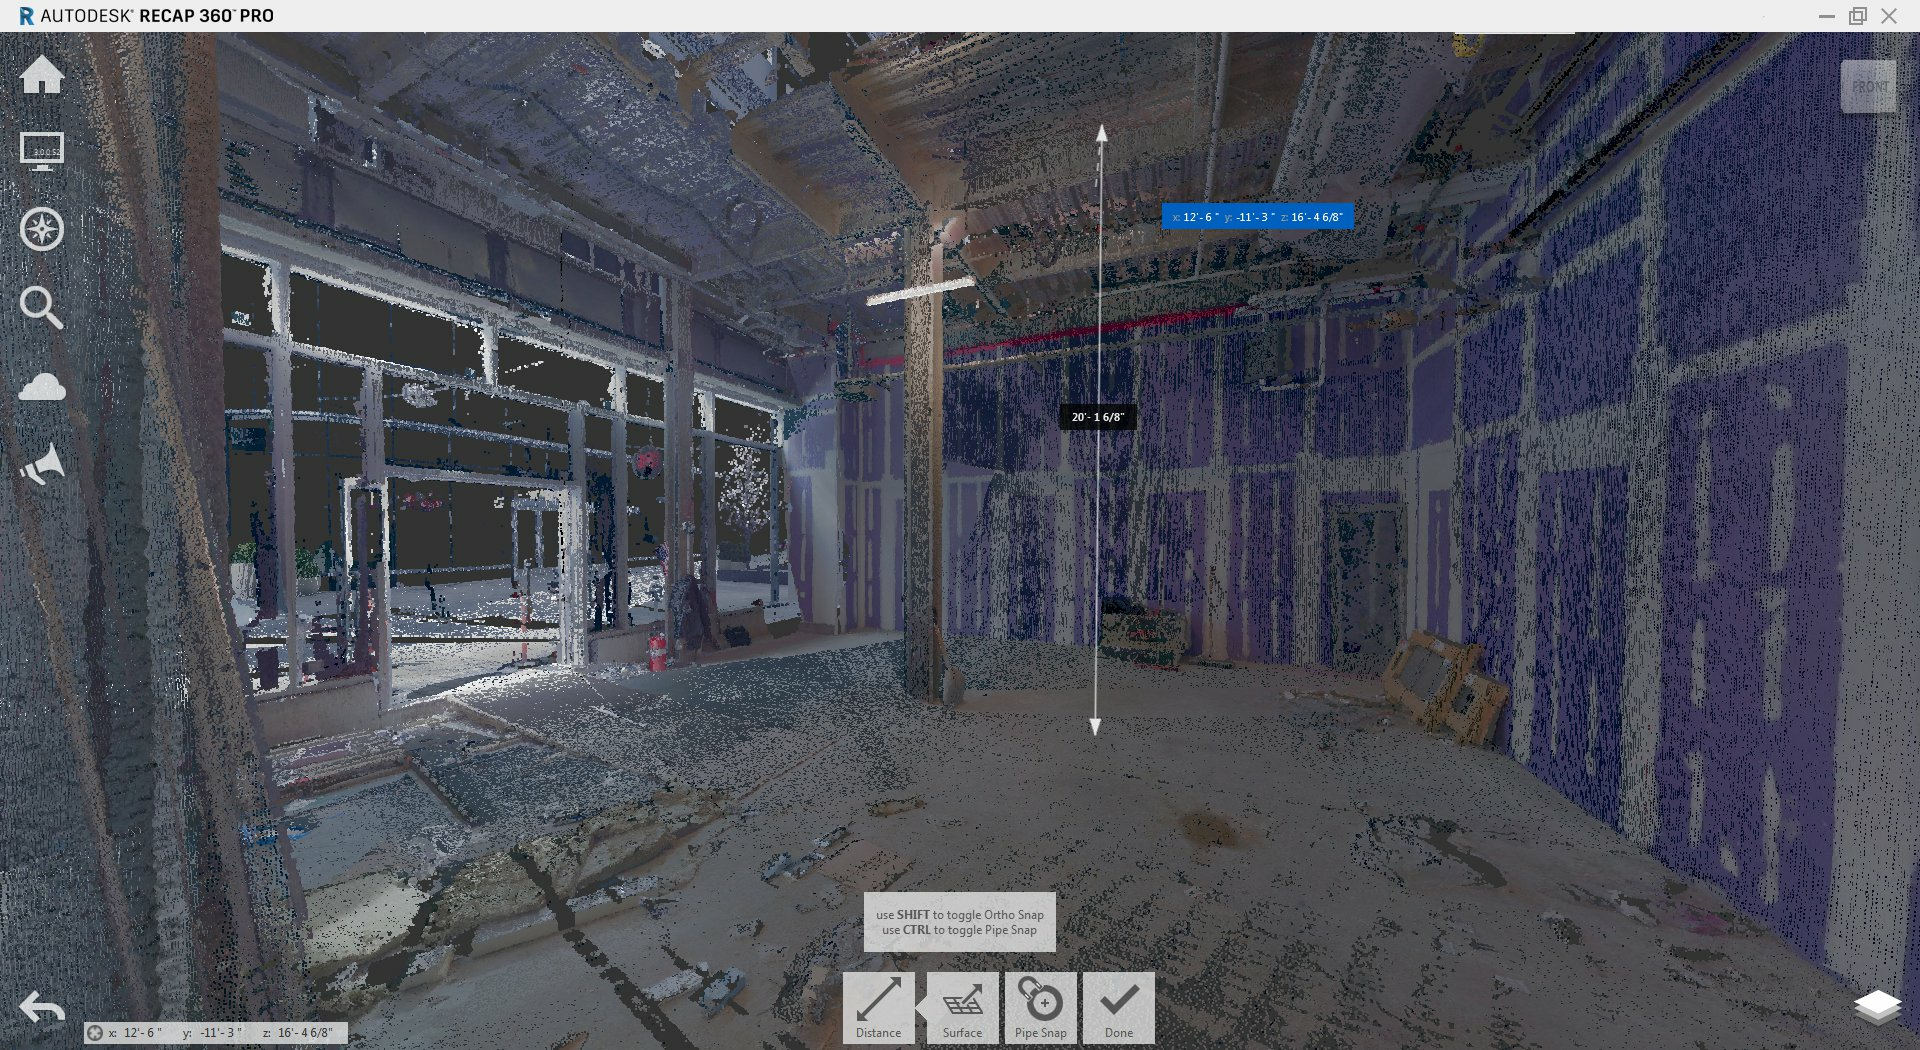
As you can imagine, trying to eyeball two parallel points in a point cloud to determine a space’s height is a challenge. Thankfully the dimension tool has ortho settings that do the work for you (both vertically and horizontally)! Additionally, if you forget to select “Ortho Dimension”, it automatically creates a triangle based on your dimension that tells you what the ortho dimensions would be.
Post FOUR:
Annotating & Dimensioning in ReCap
Like the last post, I’m going to go through the tools I like one by one. All of these are nested in the button to the right of “Window” at the bottom of the interface (the name and icon change based on the last function used):
Note: This allows you to leave notes in the pointcloud. I use this to draw attention to critical features of the space; either to help myself remember, or for my colleagues. For organizational purposes I title each note. You can also add an attachment in several different image formats.
Distance: Under the distance button there are several options for creating a dimension.
Surface: It’s as simple as it sounds: you click on two surfaces and it measures the distance between them. I like it because regardless of where you click on the second surface it creates a straight dimension line (and it shows you how far off you were with a small guideline).
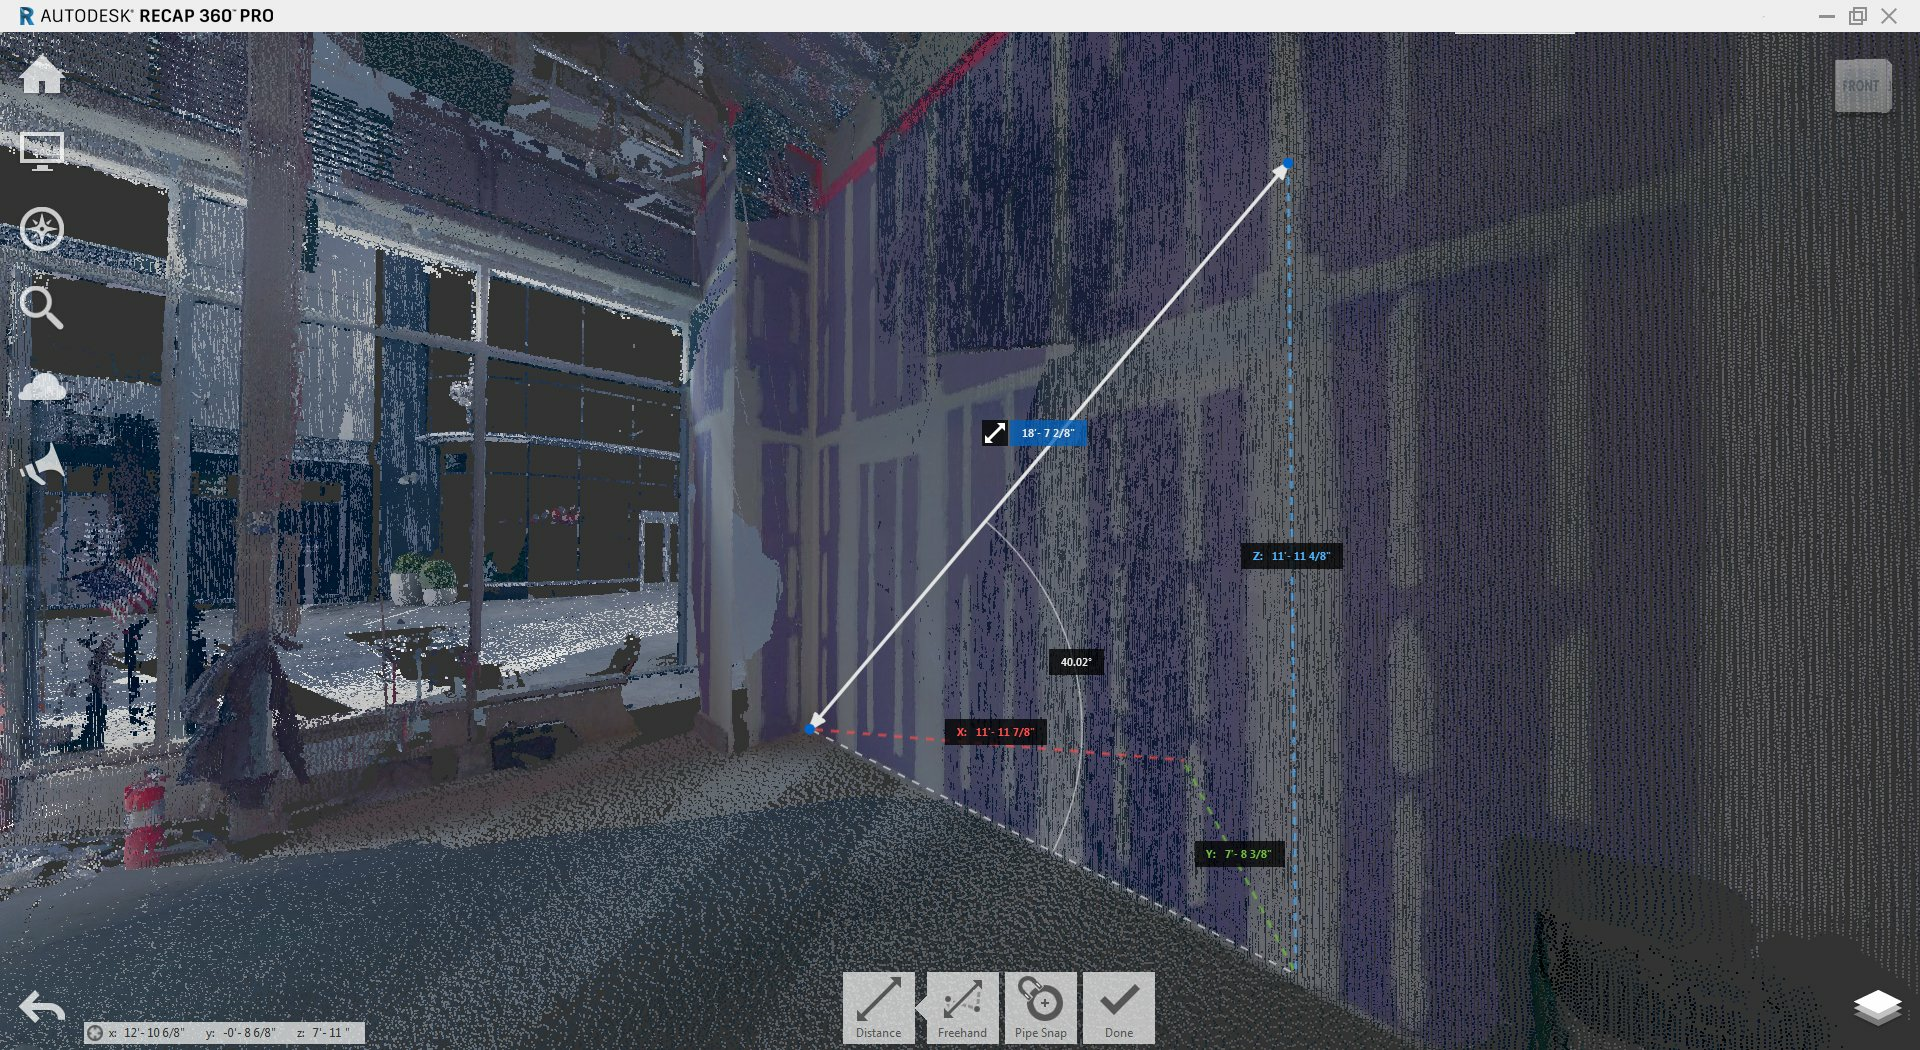
Freehand: As an architect, I don’t love the sound of freehanding dimensions, but what I like about this tool is that it triangulates the dimension in real time. While you’re placing the second point and after you click, it shows you the dimensions of the other legs of the triangle. If you’ve stayed in plane there will be one triangle and if you’ve moved out of plane there will be two triangles. When you deselect the dimension the additional triangulated dimensions will disappear, but they’ll reappear upon selection.
Faces / 3-Point: ReCap has two options for measuring angles. I prefer “Faces” which measures the angle between two adjacent faces based on your clicks.
Any note or dimension can be hidden in two ways. You can either select the item and click on the hide icon (an eye with a line through it) from it’s contextual menu, or you expand the Project Navigator in the lower right of the interface and hide it from there.
Next Post
Next time I’ll walk through the process of cleaning up a scan in ReCap.
The dimension & annotation toolbar

An annotation with attached photo
The Project Navigator allows you to hide/unhide any dimension or annotation
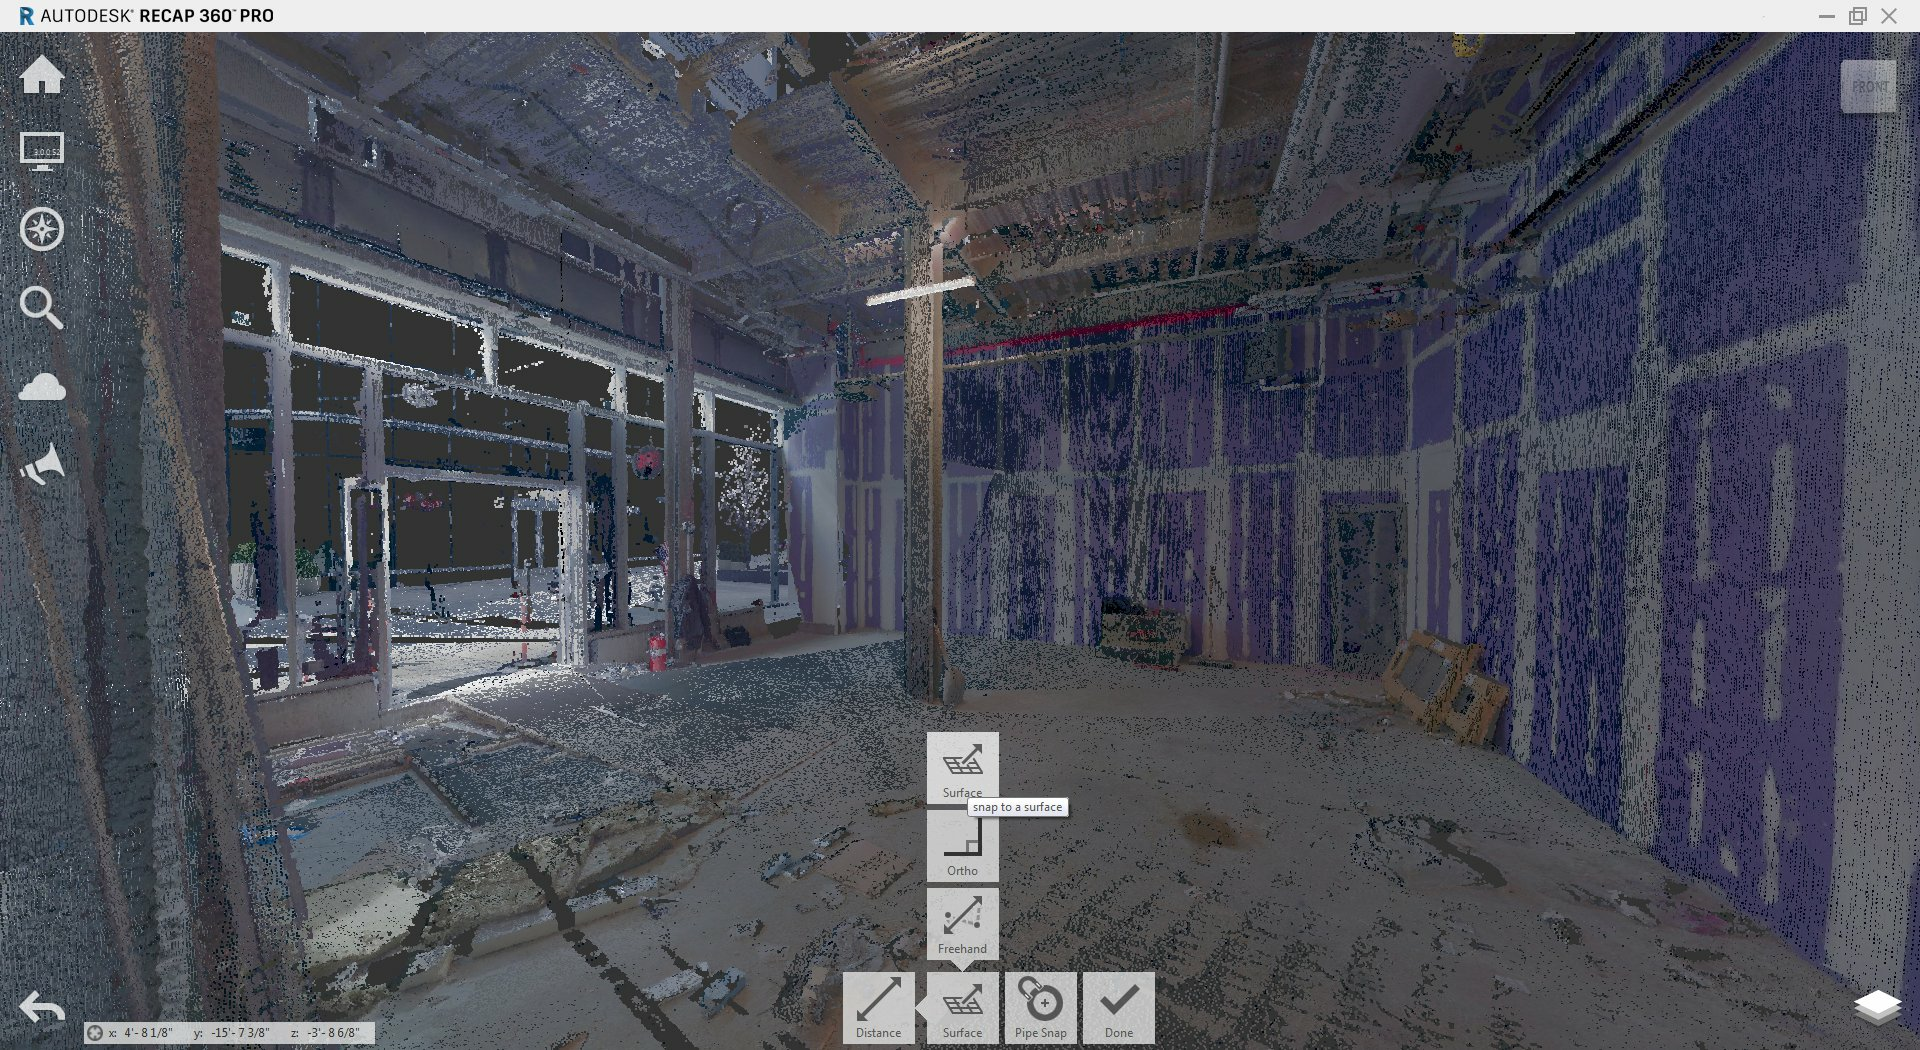
The dimension sub-menu
A surface dimension
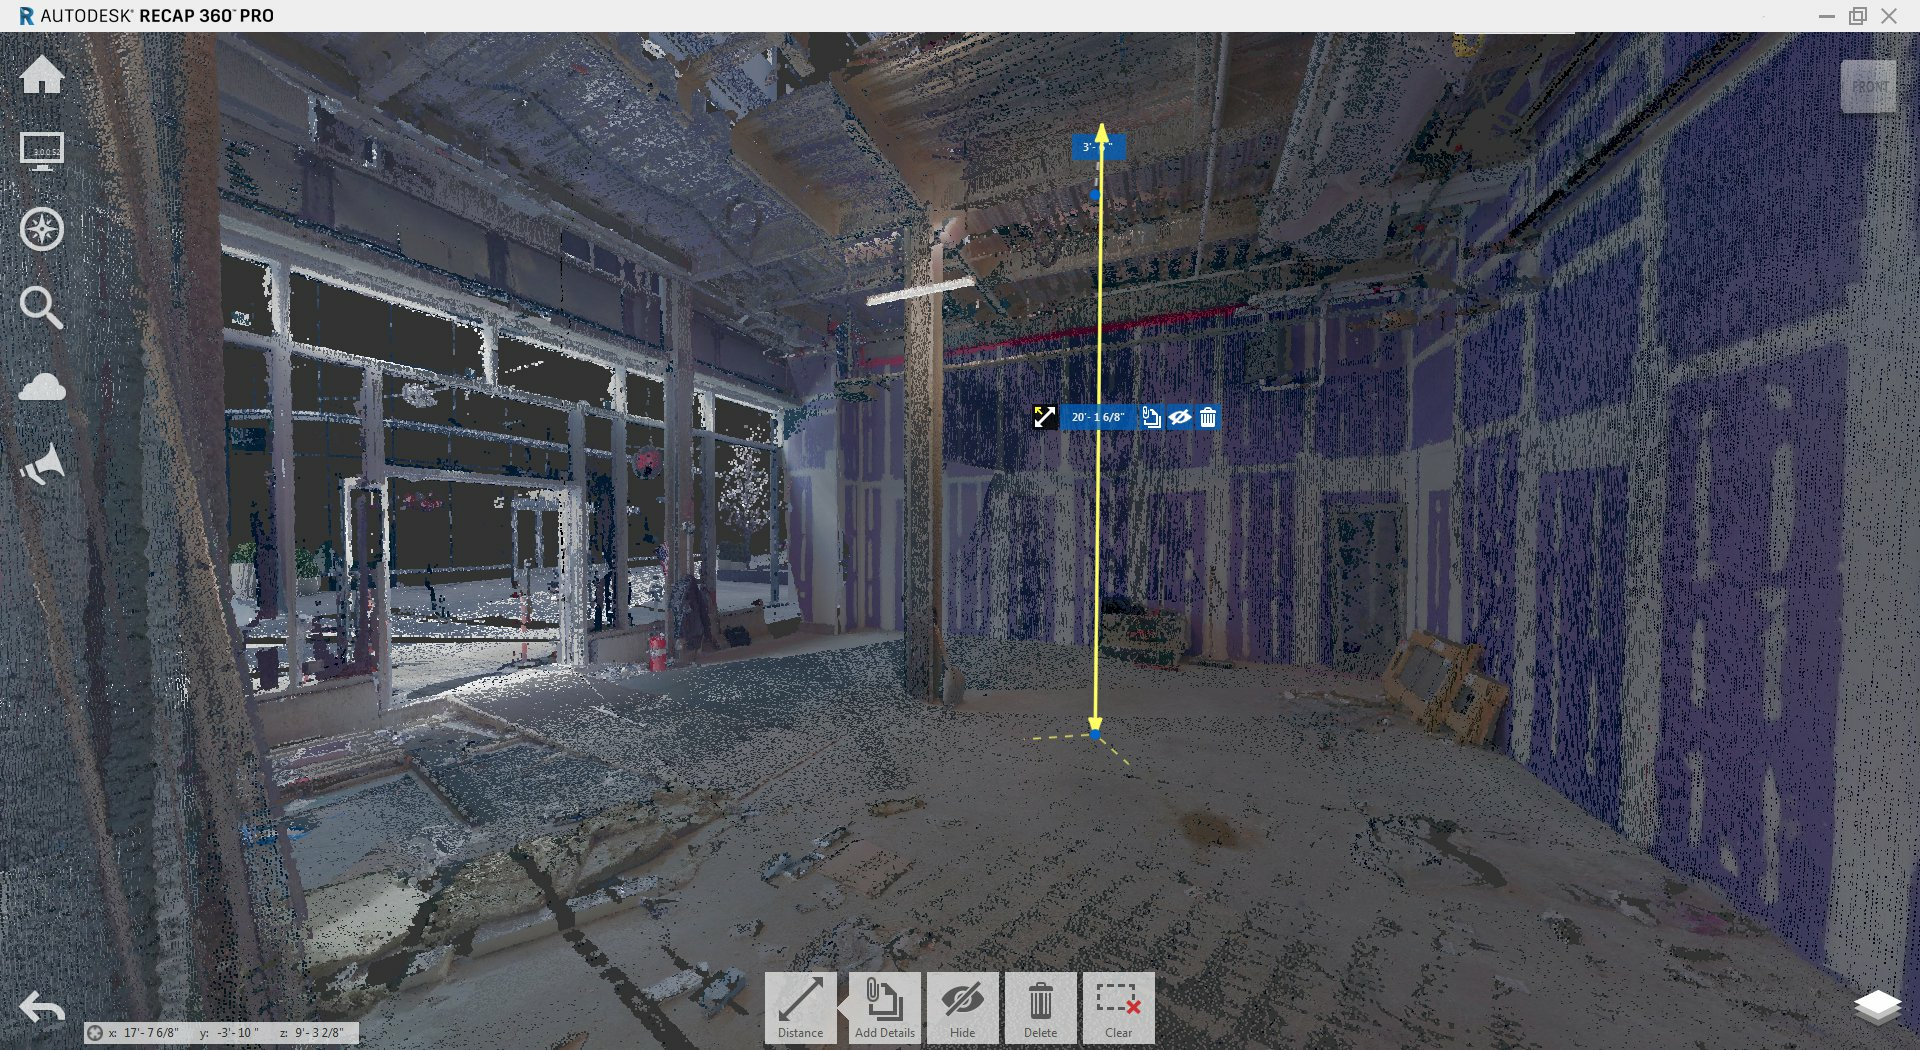
When selected, a surface dimension allows you to add annotation, hide or delete

A freehand dimension in one-plane
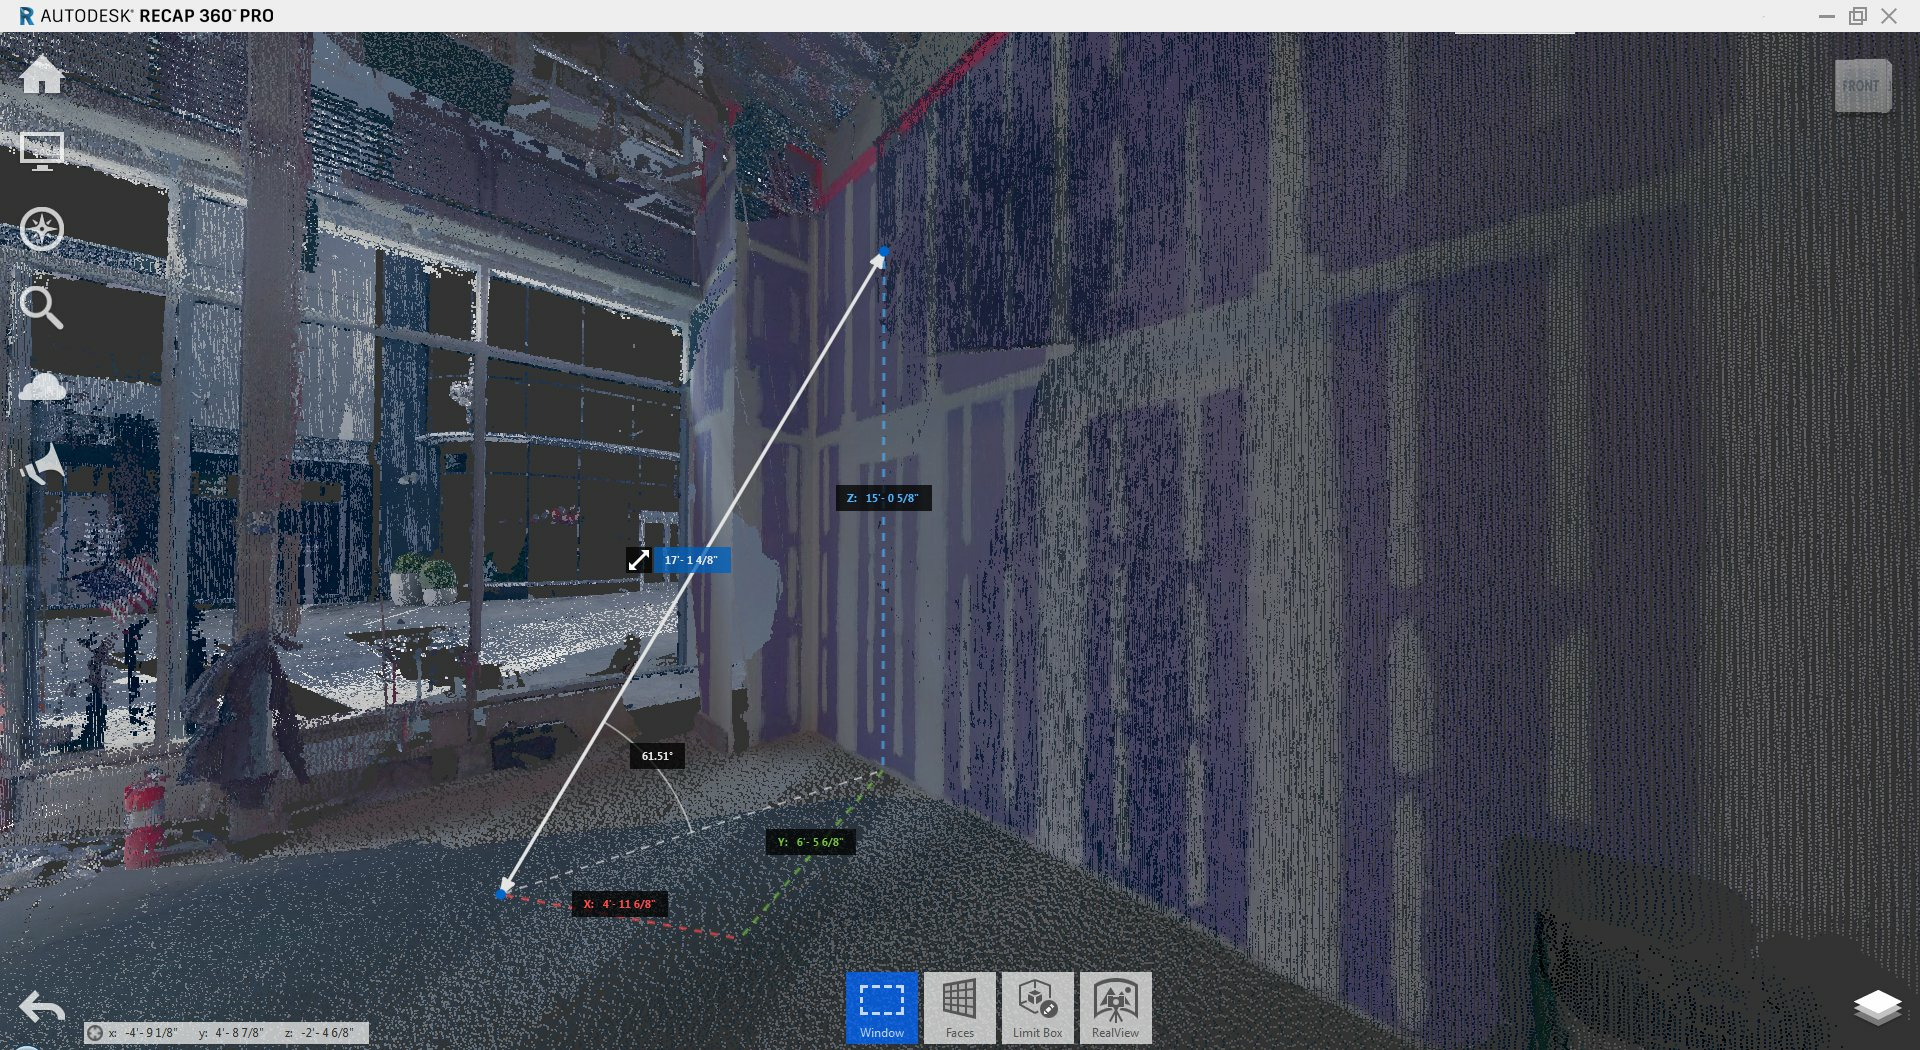

A freehand dimension in two-planes
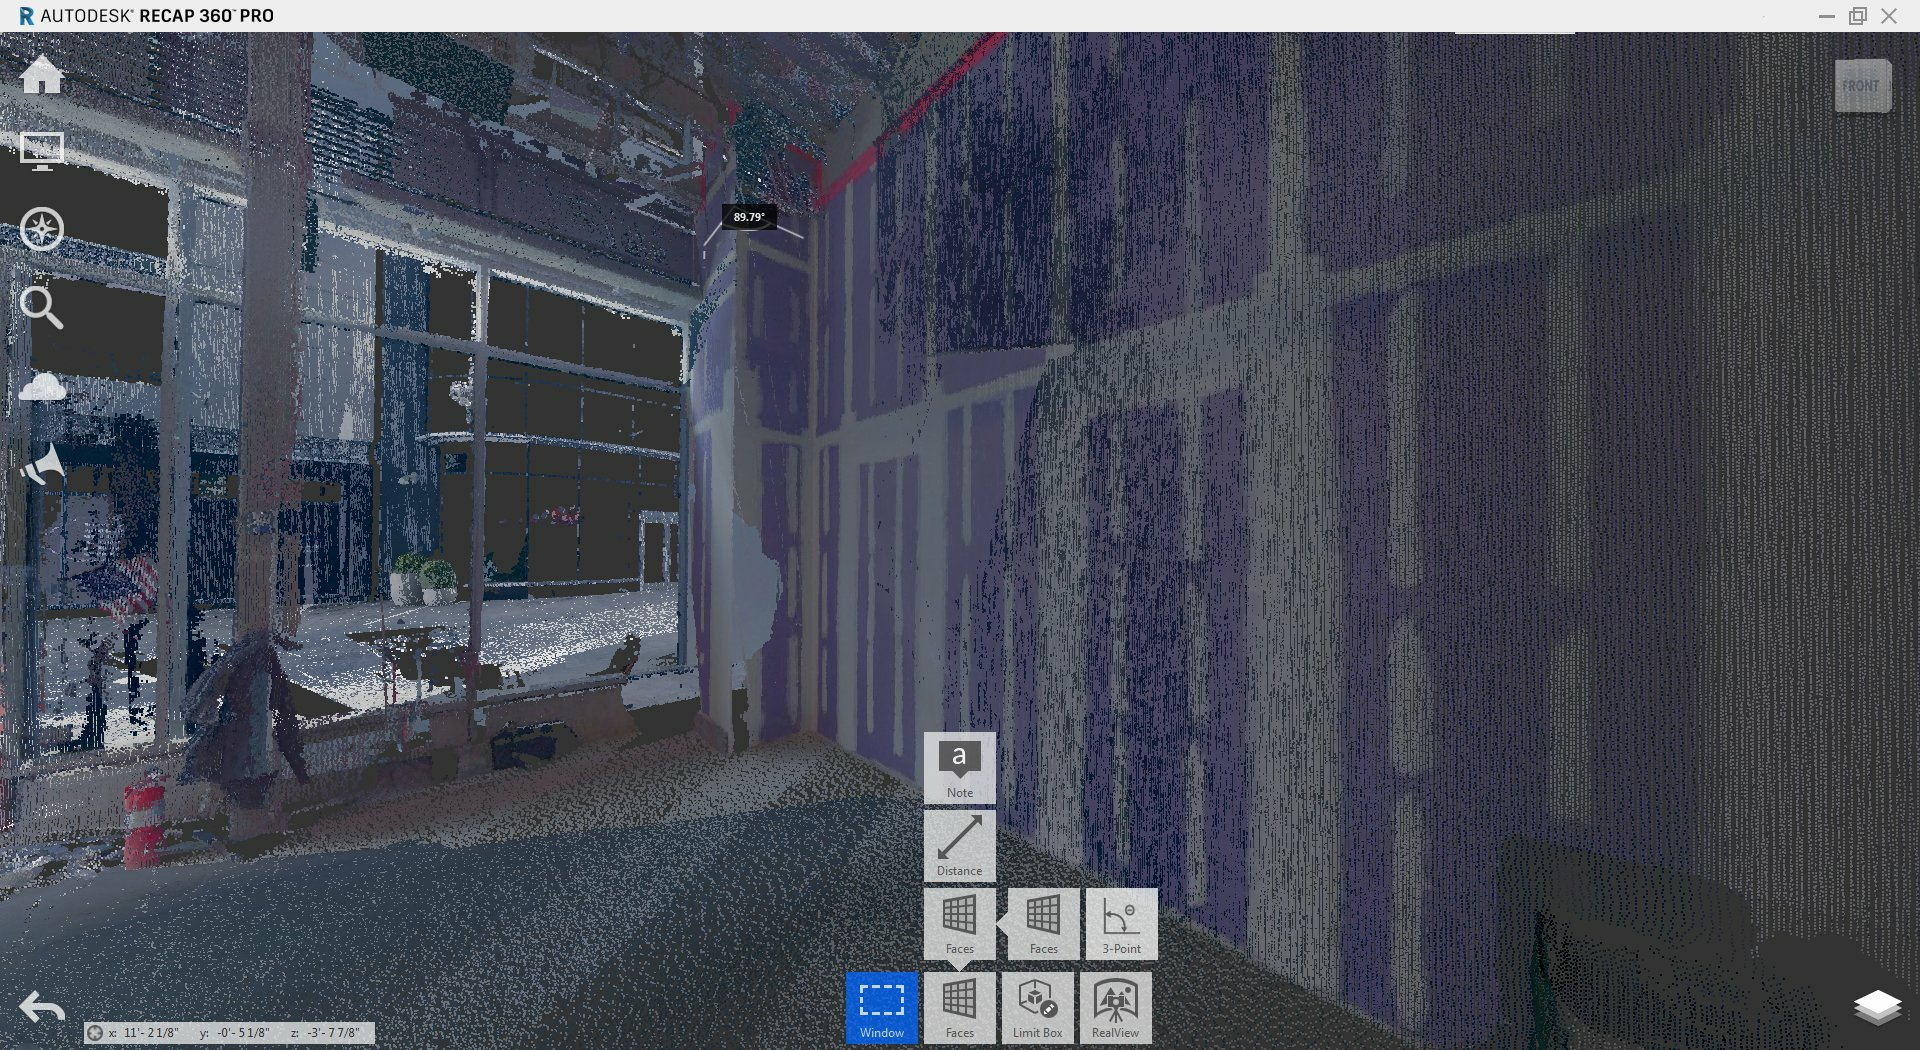
A 3-point dimension at a wall return
Disclaimer: This article features the Leica BLK360 G1. Explore the expanded capabilities of the latest BLK360 model here.


