RTC
RTC
 BLK360
 BLK2GO
 BLK ARC
 BLK2FLY
 BLK3D
BLK3D
 Accessories

The Leica BLK2GO PULSE was designed to make collecting 3D data intuitive and fast. Getting started is easy, with the Leica BLK2GO PULSE, scan exactly what you see as soon as you open the box with our getting started guide below.
Unboxing and inventory
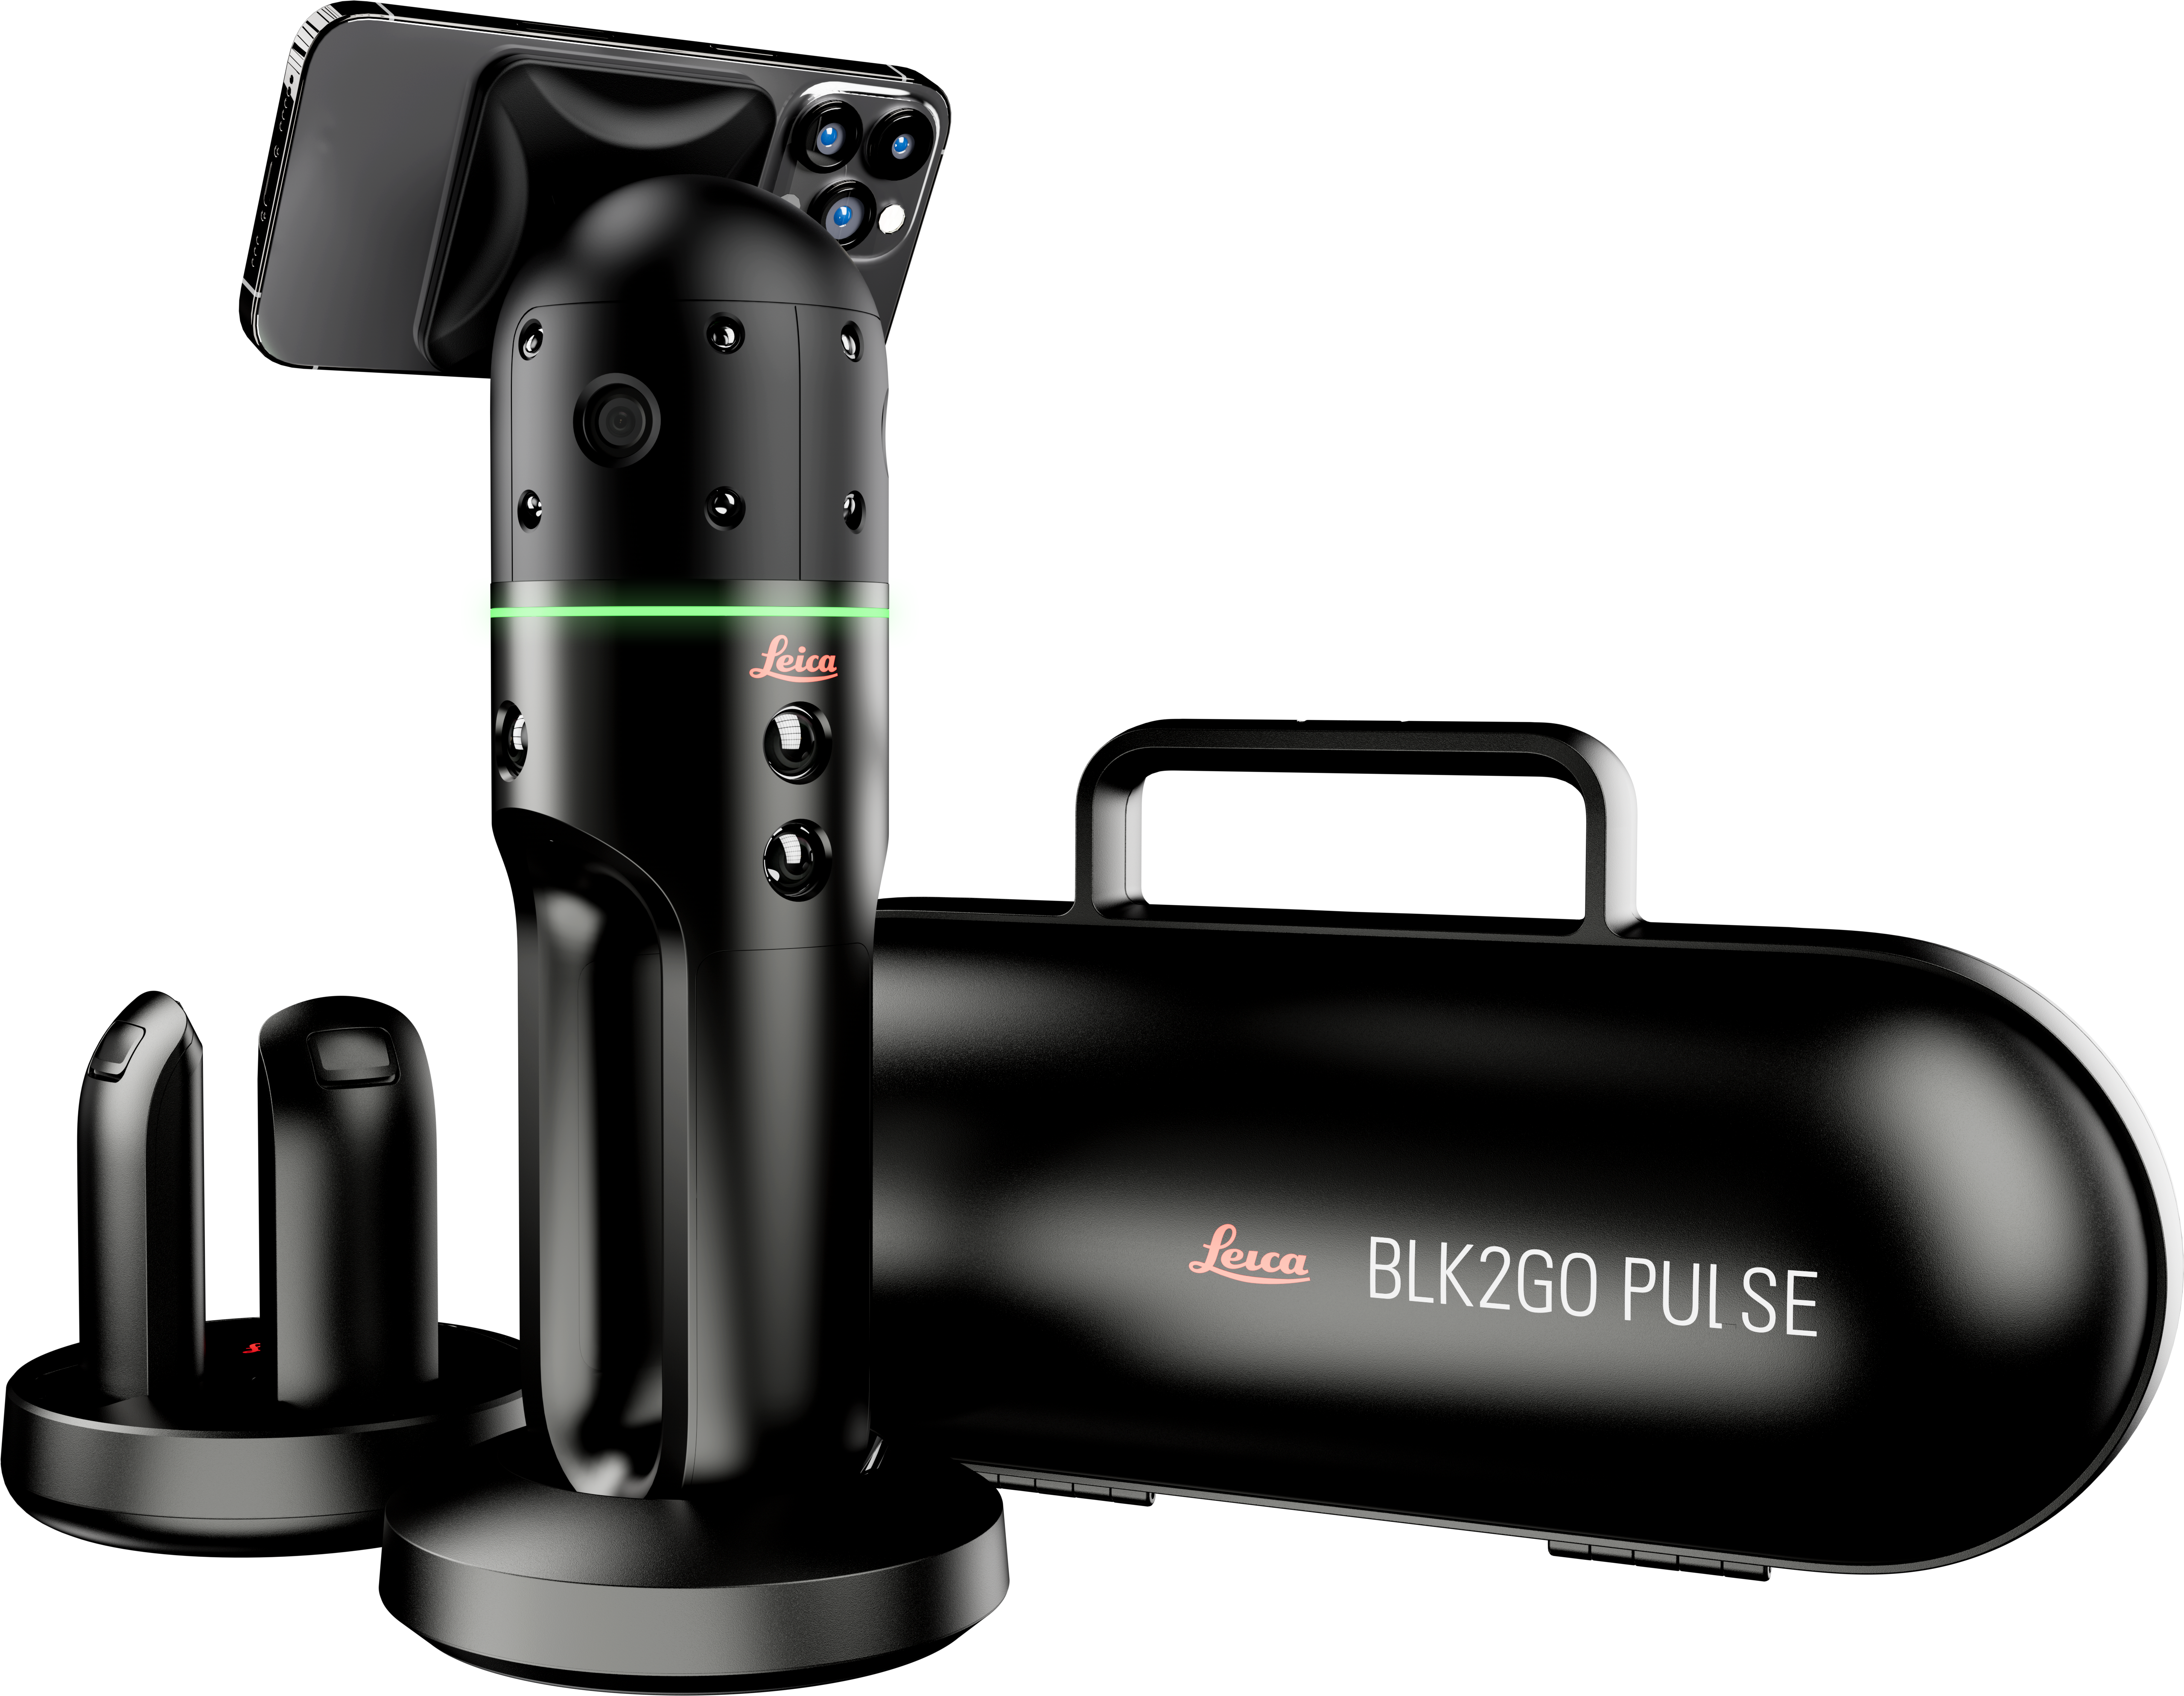
Before setting off to scan make sure your new BLK2GO PULSE comes with all the necessary equipment. Within your BLK2GO PULSE box, there should be:
- BLK2GO PULSE first-person scanner
- Transportation case
- Table stand
- Multicharger with power cable and AC adapter
- Lithium-Ion battery (3x)
- Mobile device mount and cap
- Wrist strap
- USB-C data cable
- Cleaning cloth
- USB documentation card
- BLK2GO PULSE QR card

Charge your batteries
Now that everything is accounted for, let’s charge your BLK2GO PULSE batteries. We all know that a device is only as powerful as its charge, so make sure to unpack all batteries and charge them. When choosing an environment to scan, slowly walk through the space first to estimate the time needed to scan what you need. A fully charged battery will last you up to 45 minutes of scanning, so depending on your scanning needs, one full battery might be enough. Or pack two, since the BLK2GO PULSE’s carrying case has room for multiple batteries and extend your scanning time out in the field!

BLK Live app
While you wait for the batteries to top off, let’s download the free companion app for the BLK2GO PULSE: the BLK Live app for your iOS and Android devices.
We highly recommend using the BLK2GO PULSE with a smartphone via the BLK Live app. The combination of the BLK2GO PULSE and your mounted smartphone running the BLK Live app delivers the full first-person scanning experience directly to you. Access the most important information on the BLK Live app with just a tap and see exactly what your scanner sees.
➡ Connecting to the BLK Live app

Press the button on the BLK2GO PULSE to turn the scanner on. Once on, open the BLK Live app and tap the link icon on the bottom left screen. Select the Leica BLK2GO PULSE to connect. And choose your preferred connection type. Tapping either connection type will prompt you to enter your SSID and passcode to your network. For an offline connection, scan the QR code (found in your BLK2GO PULSE box). Once entered, tap “Connect,” and your BLK2GO PULSE will sync with the BLK Live app.
At this time, you’ve already started thinking how you will use the data, Quick note: There are two modes of operation for the BLK2GO PULSE: offline and online. Both modes keep you in full control of your BLK2GO PULSE, and captured data is streamed directly to your smartphone. To activate online mode, you need to establish an internet connection to upload all your data (including panoramic images) directly to Hexagon GeoCloud. And opt for offline mode when your area has a poor internet connection. While the BLK2GO PULSE is in offline mode, you can upload .e57 point clouds from your smartphone using a mobile internet connection directly from the app to Hexagon GeoCloud.
With Hexagon GeoCloud, streamline your BLK2GO PULSE workflow with direct data upload from the field. Visualize, collaborate, and securely share point clouds to be viewed on any device with a web browser.
➡ Device status

Now that your BLK2GO PULSE is connected to the BLK Live app, you can view your device status. Battery percentage and a battery icon showing the exact charge will be displayed in the bottom right corner of the app. Tap on the “Status” tab for more information on your battery status, device temperature, and storage.
➡ Firmware updates
Let’s quickly dive into firmware updates for your BLK2GO PULSE. Firmware updates keep your device in tip-top shape, with improvements and bug fixes regularly delivered to your BLK2GO PULSE via OTA updates. If you have enabled mobile data for the BLK Live app on your phone, opening the app will notify you about the available updates. All you need to do is tap “Accept,” and the updates will download.
➡ Initialization
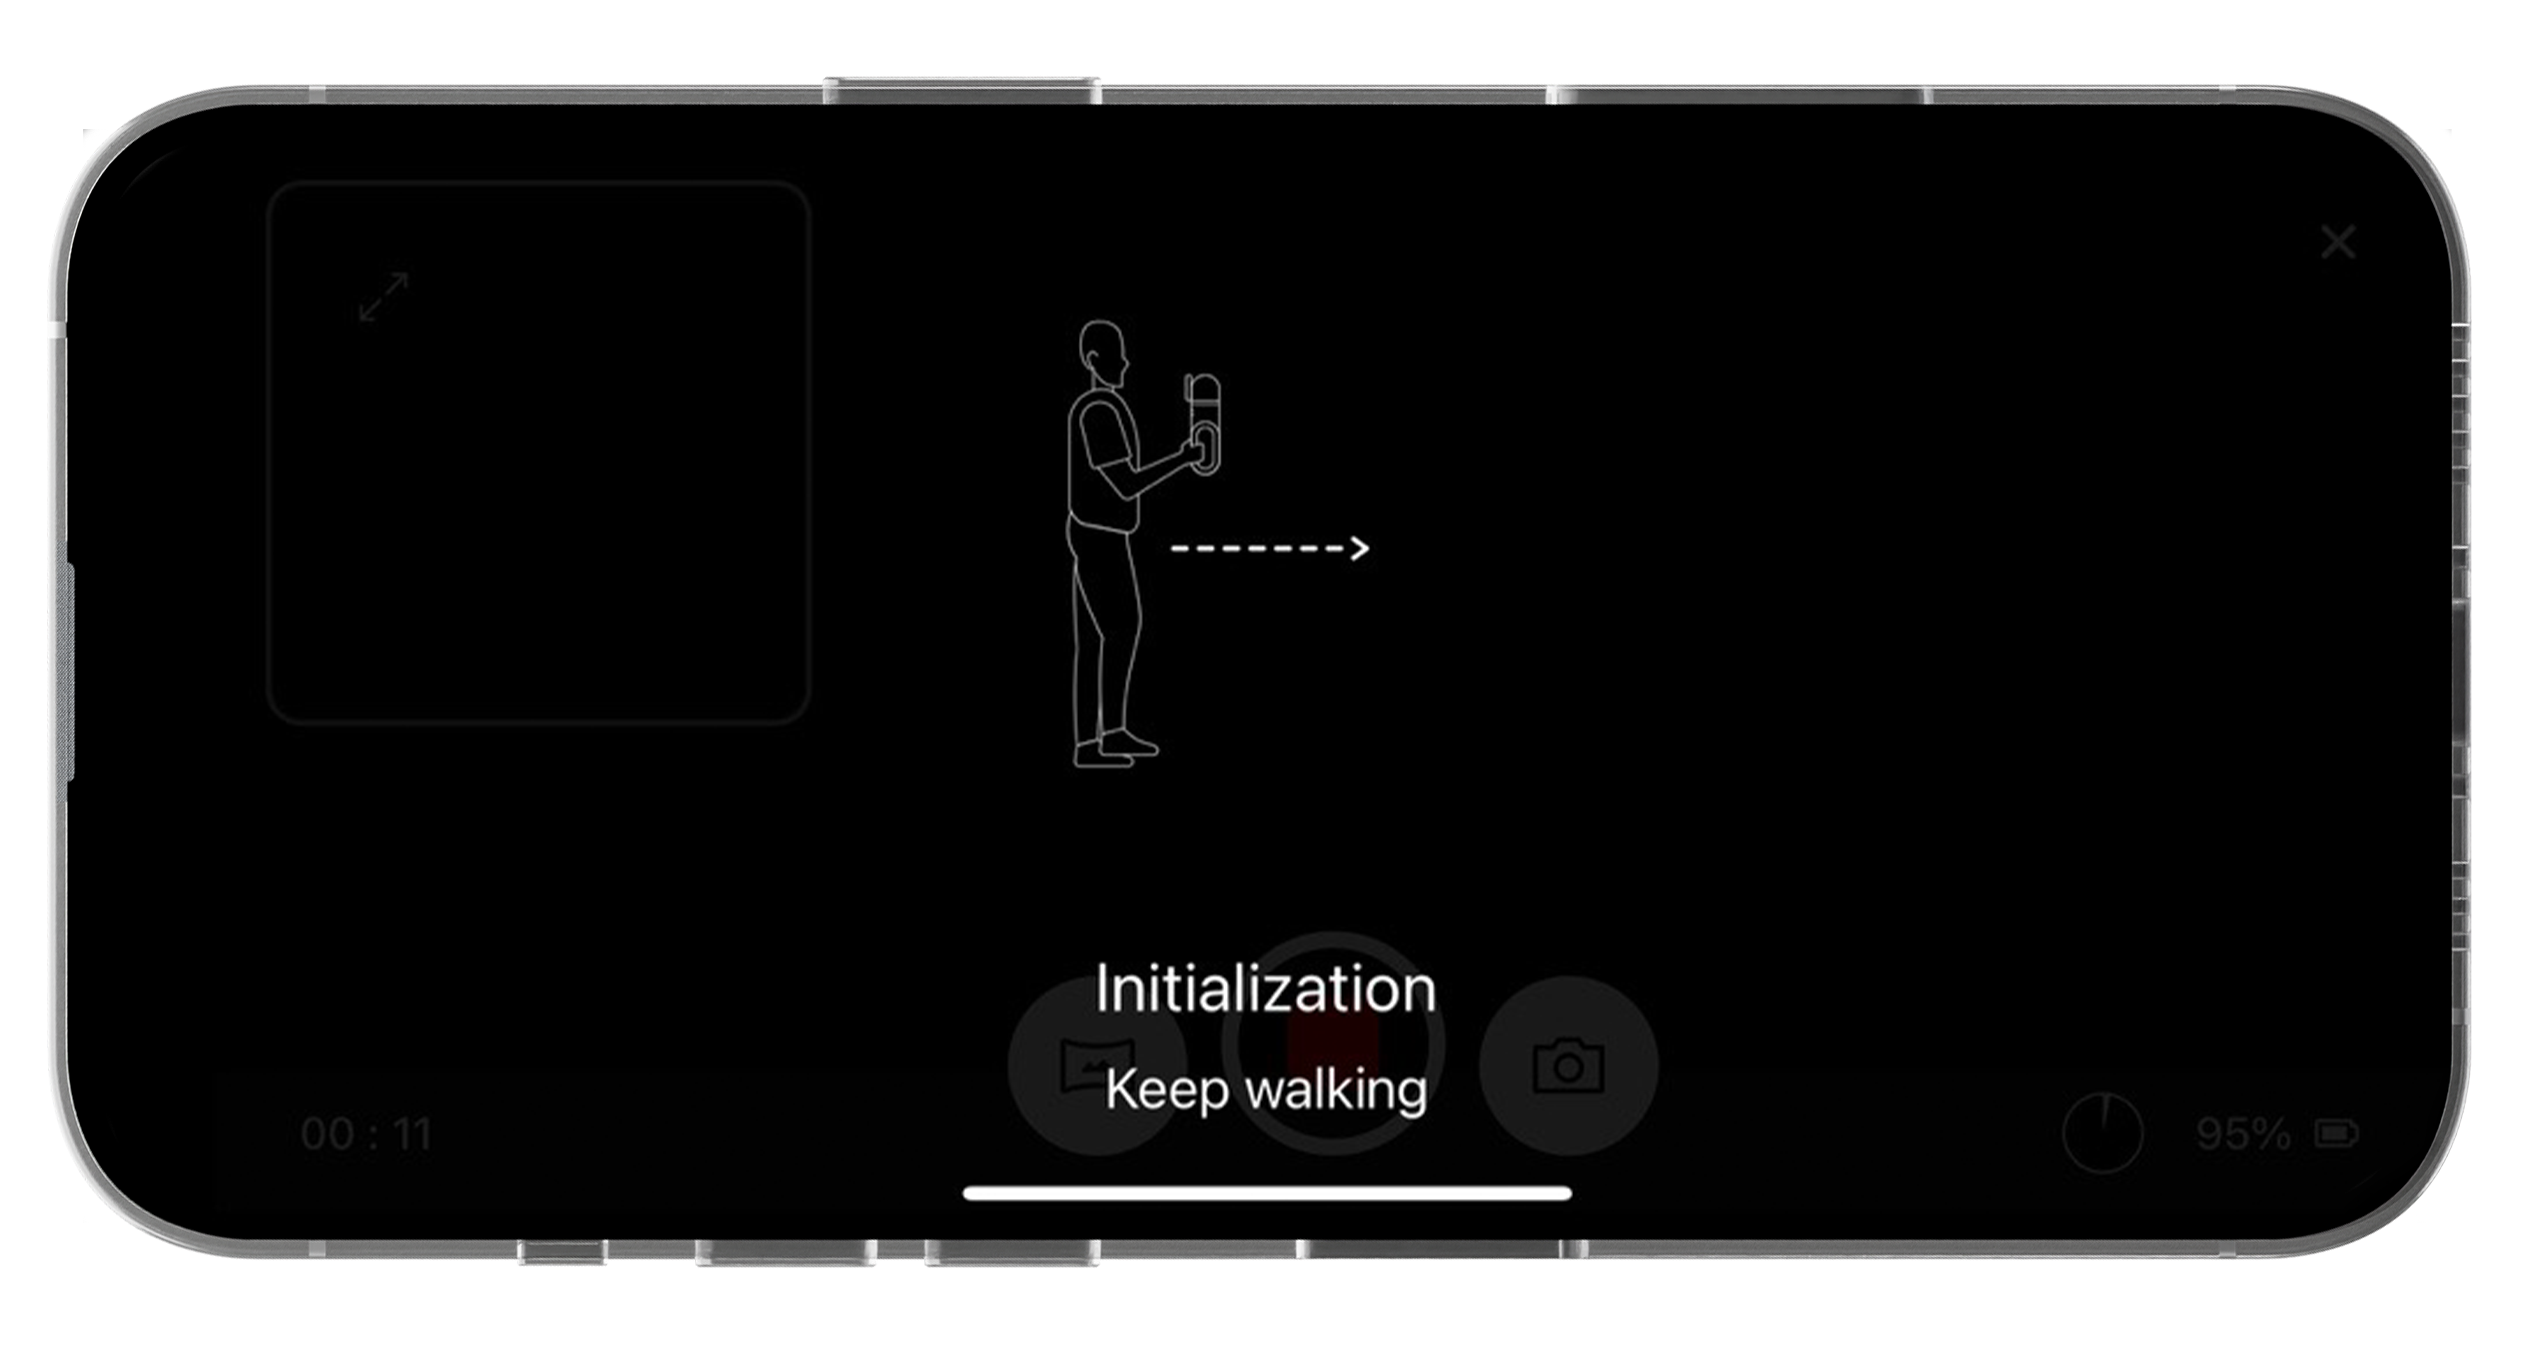
At the beginning of each scan, you’ll need to initialize the BLK2GO PULSE so it can accurately track its location in space, so you can just walk to scan. Initializing with the BLK2GO PULSE simply prepares the mobile scanner for capturing 3D data. To start capturing, press the BLK2GO PULSE button, place your hand firmly on your BLK2GO PULSE, and walk forward. When the LED ring on your device pulsates green, the initialization process is officially complete.
While walking with the BLK2GO PULSE, a 3D and 2D view will appear – this is how you’ll know the device has initialized correctly, and you can begin scanning.
➡ Controls
On your very first time scanning with BLK2GO PULSE, we recommend doing a test scan to get familiar with the controls. With touchscreen controls, choose when and how the BLK2GO PULSE captures data. With the app, start and stop a scan and capture both detailed still and panoramic images.
To start or stop a scan from the app, press the red record button on the screen. You will see a blue line signifying the scan path you are walking, and the red button will pulsate when scanning is occurring.
To capture images while scanning, tap the panoramic icon for a 270-degree image from the scanner’s perspective. Or tap the single camera icon to take a picture of what’s in front of the BLK2GO PULSE with its 12-megapixel camera for high-resolution photos. Whenever and whichever way you take photos, the BLK2GO PULSE will place the image directly in the point cloud, in the exact location where you stood while scanning for quick reference and easy viewing.
To stop scanning, press the button on your PULSE or tap the red button once more. Once you’ve finished scanning, you can fly through your data, pinch to zoom, and point and drag the screen to review what you’ve captured.
➡ Viewing Modes
With your smartphone mounted onto your BLK2GO PULSE, view your captured data from the scanner’s perspective in real-time as you walk with the BLK2GO PULSE. Switch between first-person 3D and top-down 2D views of your scanner's captured data with customizable display options. Choose how you want your first-person view to look on screen by rotating it to landscape or portrait mode for a mounted position that works best for your scanning needs.
Want to view both modes at the same time? Split the screen between 3D and 2D views to fully visualize your data for top-down and all-around views of your scans.

-
3D View: Allows you to see all dimensions of your scan data as a fully colorized point cloud.
-
2D view: Use a top-down vantage point of the BLK2GO PULSE's scan data and view the space as it appears from above.
Swipe down from the top screen and mix whichever options best suit you.
BLK Live App and Hexagon GeoCloud
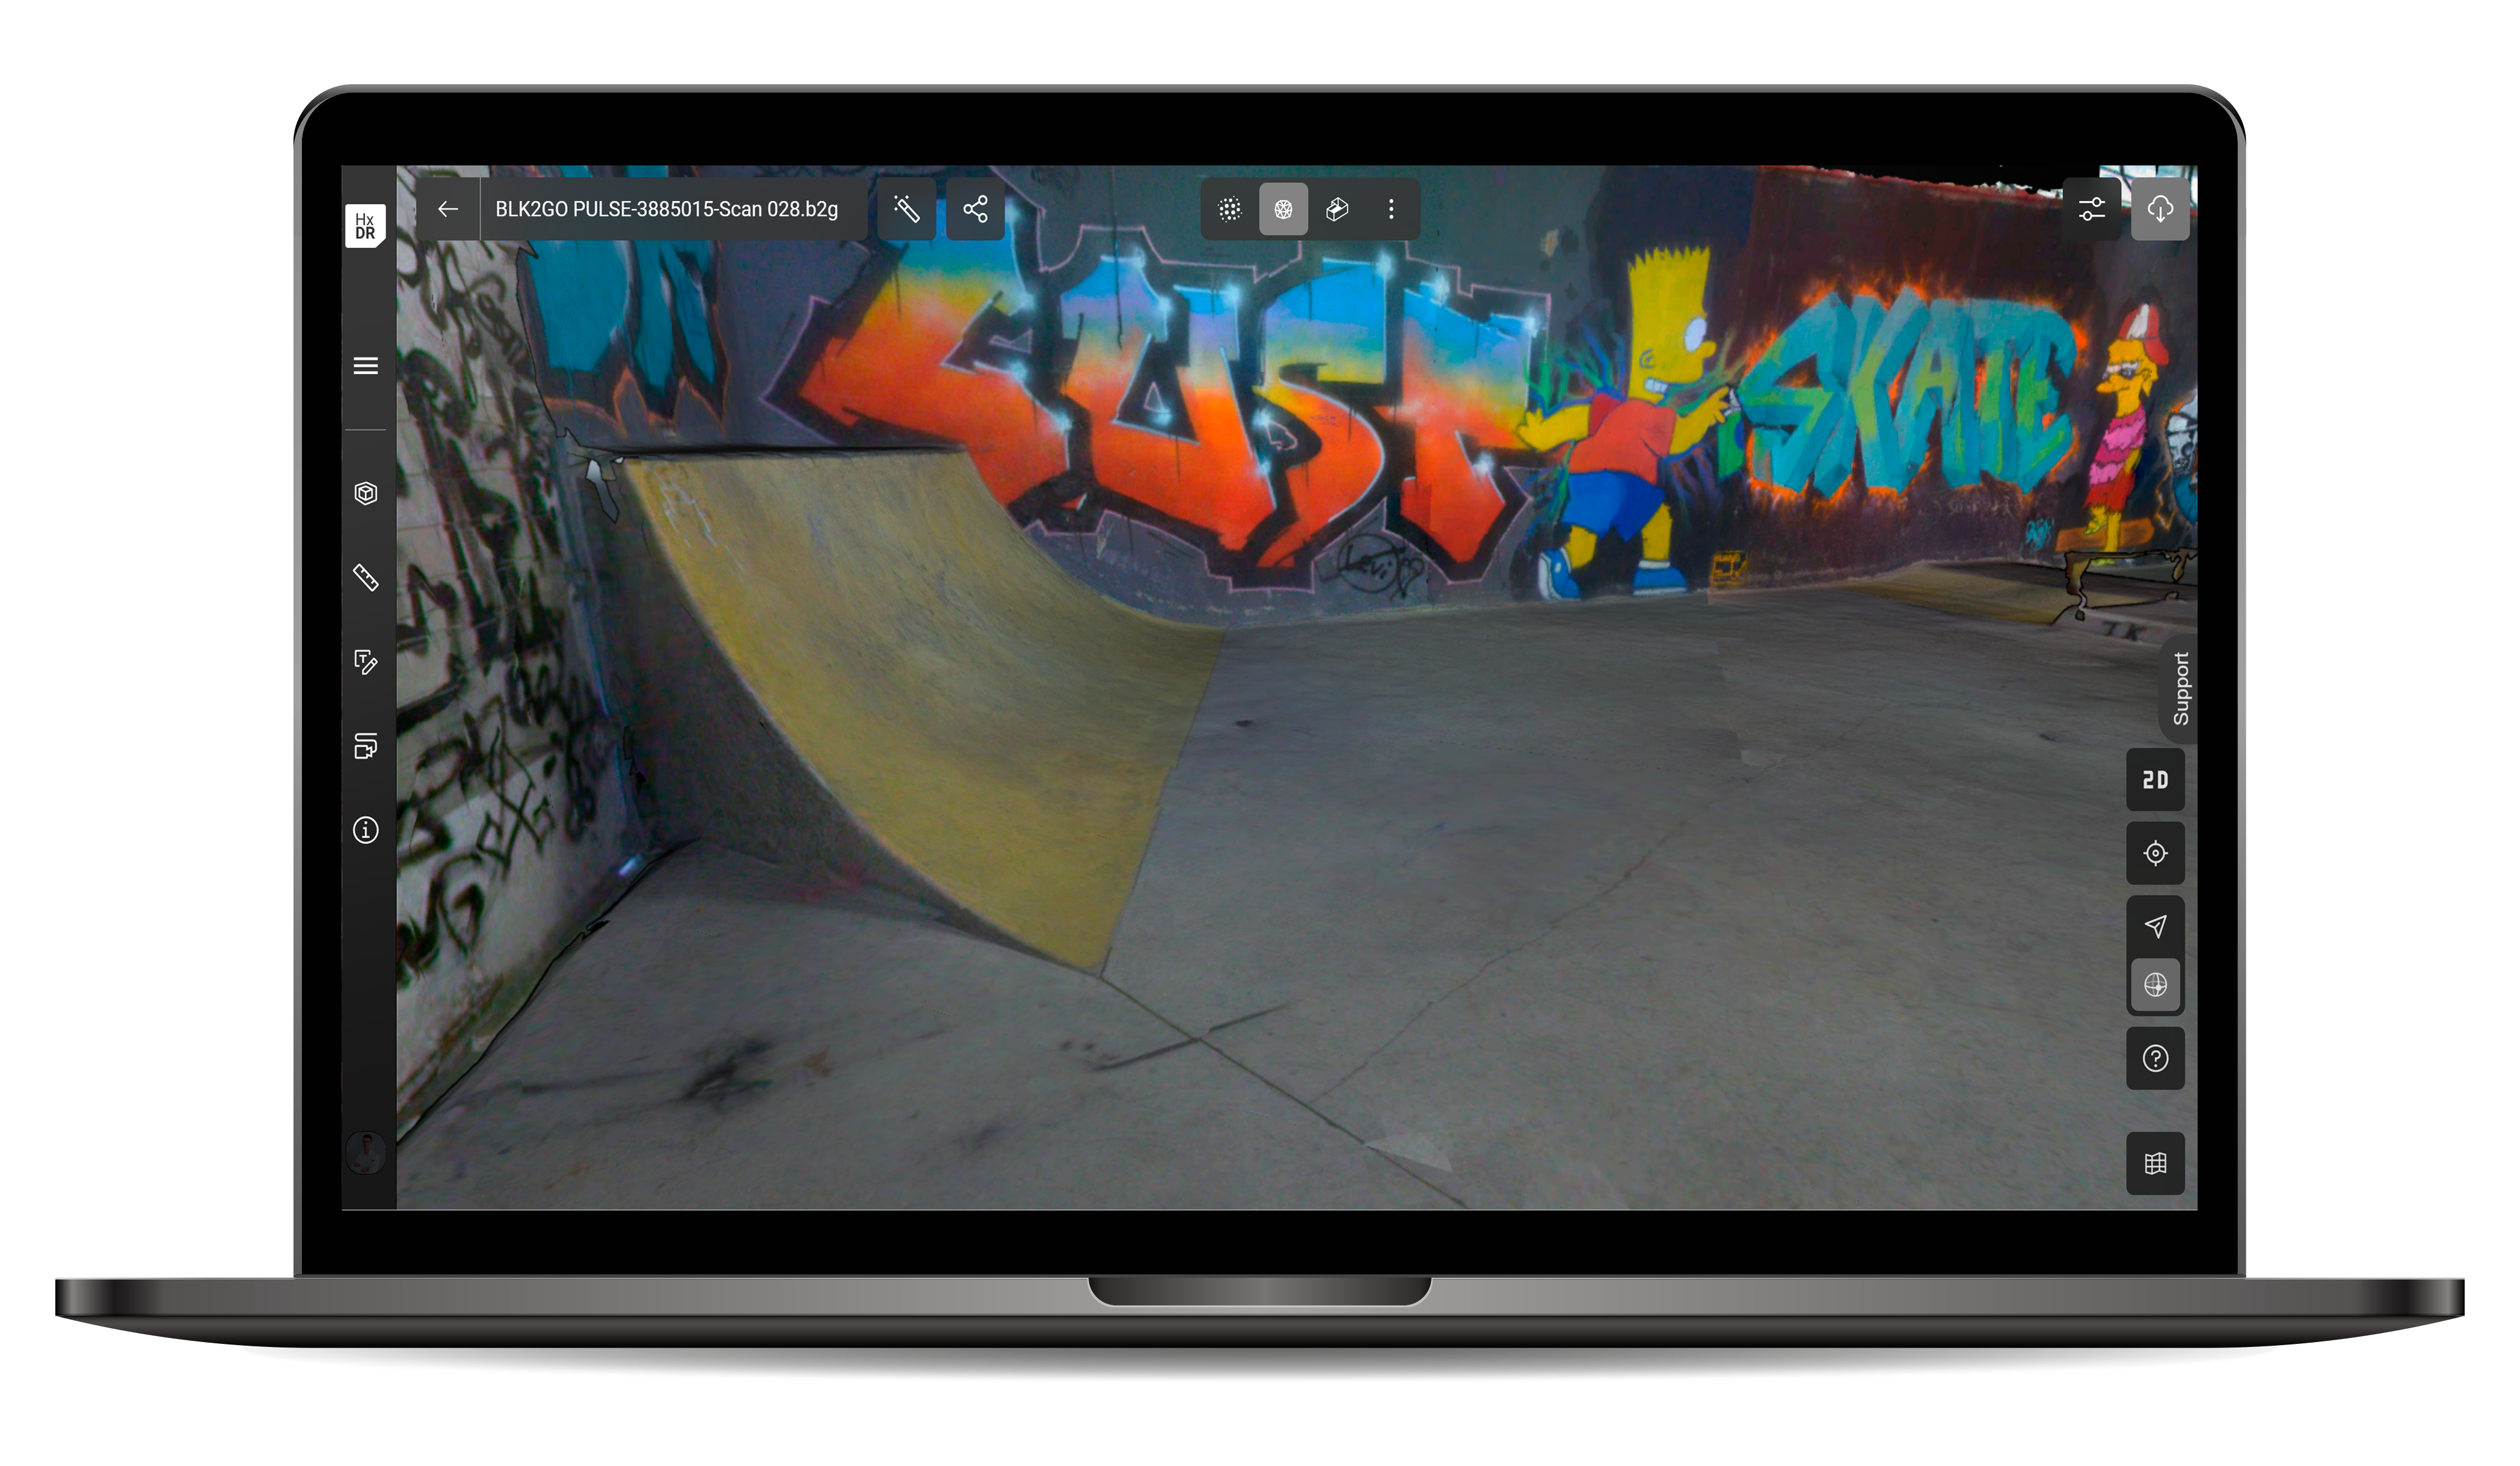
The BLK2GO PULSE takes full advantage of the real-time data streamed directly to your device via the BLK Live app. Upload your data from your BLK2GO PULSE (while in online mode) to Hexagon GeoCloud for collaboration with colleagues and stakeholders, automatic features like auto-meshing and registration, and an elevated visualization toolkit.
The quickest way to upload your scan data to Hexagon GeoCloud is to tap on the Hexagon GeoCloud icon on the left-hand side of the screen just after you’ve completed your scan. And presto, your .b2g file containing all the scan data plus all the image data and metadata from your scan is uploaded to Hexagon GeoCloud. Now, work on your data from any device with a web browser.
Uploading multiple scans to Hexagon GeoCloud
If you’re uploading multiple scan projects at once or want to upload a select few to Hexagon GeoCloud, tap the “Job” menu to view all your scans. Then, long-press any scan to select the specific jobs you want to upload. Tap “Hexagon GeoCloud Upload" and choose the project in Hexagon GeoCloud you’d like to upload your scans to . Confirm “Yes,” and voilà, your scans are ready for you on Hexagon GeoCloud.
The Leica BLK2GO PULSE in the field
Your batteries are charged, your device is fully updated, and you’ve reviewed controls and view modes for your BLK2GO PULSE, as well as the field-to-cloud workflow with Hexagon GeoCloud.
Take your BLK2GO PULSE into the field and practice to get familiar with first-person scanning. The BLK2GO PULSE is designed to be an intuitive reality capture experience, so once you start, it’ll take no time before you get the hang of it.
In case you need any other tips, check out Leica BLK2GO PULSE Best Practices.
Happy scanning!
– BLK2GO PULSE product team
Curious about the BLK2GO PULSE?
Contact one of our laser scanning specialists to hear more.