To help you navigate this landscape, I've summarized some key information about laser levels to help you ask the right questions when you are doing your research. I'm using Leica Linos as a reference (as I know them best), but this information applies to laser levels in general.
Typical Laser Level Configurations and Uses:
| Image

|
| Image

|
| Image

|
| Image

|
| Image

|
| Image

|
Self-leveling
Self-leveling laser levels use a pendulum to make sure the lines and/or points are level even if the tool itself is not (the pendulum in Linos can compensate for up to ~4 degrees out of level).
If the level is bumped, it will automatically re-level as long as it remains in the working range of the leveling mechanism. If the level is bumped out of its working range, most line lasers (including Linos) will start to blink to notify you of a problem and others simply switch off.
Maintaining level is not a concern with self-leveling laser tools. The thing to watch out for is making sure the laser line stays on your reference height. If someone bumps the tripod, surface or the stud it is attached enough to move the unit, you could end up working at a different height even though the tool is still level -- and it won't blink to let you know because it has no way of knowing what your reference height is. The best practice is to check your reference a few times throughout the day (and a fast, easy, and extremely accurate way to that is to use a DISTO).
A word to the wise: You may come across a low-priced manual laser level. These are different from a self-leveling laser, in that a manual laser level requires you to level the laser by hand (and keep checking it during the day to make sure it stays level) by using some type of bubble level and adjustment screws on the laser base. Manual leveling lasers are time-consuming and can cause big problems if someone accidentally bumps the laser out of level and manual laser level beam will not blink or shut down when that happens.
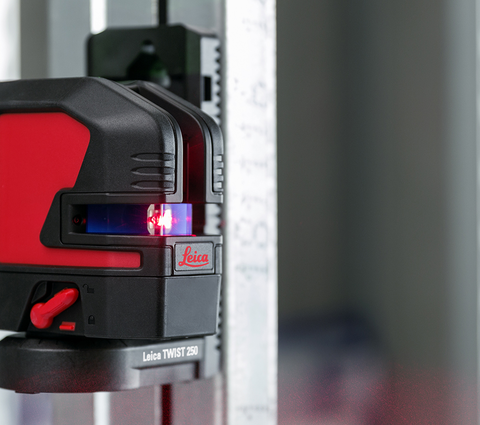
See the Leica Lino L2G+ self-leveling function above
Pendulum lock
Picture a miniature pendulum supported on high-precision ball bearings. The laser emitter is attached to the pendulum, which always seeks to hang straight down because of gravity. Bump the laser and the pendulum will swing and quickly settle down back to level (and so will your laser line).
But there are times when you might need a sloped line (example, locating handrail bracket install points on a stairway). A pendulum lock allows you to lock the pendulum to stop it from swinging. Once the pendulum is locked the device will no longer flash the laser if it is out of level and you can simply tilt the laser to project the line at the angle you need. The flip side of that is you want to make sure to disengage the pendulum lock when you need a level line.
You will also want to engage the pendulum lock to protect the mechanism when it is not being used, in case the device is accidentally dropped or banged around in transit.
Power to work throughout the day
Most self-leveling lasers use alkaline batteries or some type of rechargeable battery system. The newer green lasers on the market have brighter beams than red lasers but can also use more battery power than a red laser (some green lasers have a run time as short as a couple of hours).
There are more environmentally friendly rechargeable options available, both built-in and external. If you have built-in batteries, make sure you can “run-charge” them, meaning charge the batteries while you use the tool.
A great setup is a rechargeable option with an alkaline battery back up. Leica does this with our Triple Power concept. Rechargeable AA batteries are another option.
Housing and tool construction
Will a big rubber bumper around the tool protect it from a drop? Maybe, maybe not. A poorly designed tool can’t be saved by a ¼” thick piece of rubber no matter how cool or tough the bumper looks. The durability of the laser tool is engineered from the inside out. We all know that cheap tools are cheap for a reason, so it is better to have a solid tool with a pendulum lock and to treat it like a precision measuring tool it is. It doesn’t need to be treated like a work of art, just don’t abuse it. And it never hurts to check the leveling accuracy occasionally.
Range and accuracy
A major driver of line leveling accuracy is the pendulum setting (that's why you want to protect the pendulum from hard shocks with a lock). The accuracy is expressed as leveling error over a given range, like 1/16” at 15’. Double the range to 30’ and the error doubles to 1/8”. At 8' you should have half the error—but sometimes the laser line is wider than the accuracy specification. Many laser levels claim 1/16” accuracy at 15’.
The problem is that a cheap laser level 15' from the target will project a laser line that's ¼” wide—good luck with that! It is important to have a bright, clear, focused line. You’ll know a good laser when you see it switched on.
Green vs. Red laser
A true green laser diode costs more than a red one, but if you use a laser level for hours at a time you will appreciate the difference. State-of-the-art direct emitting green diode technology produces a bright, green line with less “beam speckle” than red lasers. The result is a clean, sharp laser line across your work surface. The green wavelength is 3 to 4 times more visible to your eye than a red laser. This means you can normally see the green laser from a farther distance than a red laser. Longer visible distance means fewer setups and fewer setups means less time needed to finish the job.
Fan angle
One way to visualize this is to think of yourself standing with your arms outstretched from your sides. From your right arm to your left arm is 180° fan angle. Stand against a wall and everything from your right arm to your left arm is in the laser plane.
Place a laser with 180° fan angle and enough range in a corner and you have a level plane in the entire room. That's one setup for the whole job, which saves time and, by extension, money.
Beam quality
Look closely at the beam against a wall from a distance of 15 feet or so. Look for sharp, bright lines. Lower quality laser tools will have fuzzy and intermittently dim lines, “ghost” or parallel lines, or dead spots in the lines. Seeing is believing, and once you see a good line next to a poor one, you can really appreciate the difference between a quality laser emitter and a cheap one.
IP54 or IP65 rating
IP stands for "Ingress Protection," or resistance to dust and moisture. The first number references dust protection, and the second references moisture protection. There are IP40 disposable laser levels (little dust protection, no moisture protection), but if you care about your tools and your work, don’t buy anything below IP54 – dust and moisture resistant. An IP54 tool can get dusty or damp.
For tough jobs or unpredictable work sites, go for IP65, Mil-Spec or higher. Drop it in the mud and wash it off with a hose. Many IP65 products are also rated for 3-6’ drop resistance as well.
Regardless of tool and IP rating, a word of advice: NEVER, NEVER put a wet tool in a closed case.
We don't have a video of a Lino enduring this, but here's a video of an IP65 Leica Total Station going through the same torture test Linos get - this thing costs $45,000!
After the purchase
I recently talked with a counter guy in Vegas and asked him how he trained people to use a laser level. He cocked his head to one side, looked at me with a puzzled face and said, “Open the box, put the batteries in and turn it on. What’s to train?”
You probably won’t need a 24-hour call center to help you use your laser level...but you might need a warranty. Buy a quality product from a reputable manufacturer that actually has a physical presence in your country and a simple "exchange" warranty. If the tool doesn’t meet the manufacturer's specs during the warranty period, you get a new tool. The warranty on these tools is usually between one and three years. Don’t expect a laser with a crushed housing to be exchanged free of charge. Warranties cover normal wear and tear and manufacturing defects, not a tool that has been run over by a grader.
Quality matters.
I can't resist one plug for our own tools: Leica Geosystems is a manufacturer of measurement tools. We have made professional surveyor's equipment for over 100 years and have been at the forefront of applying laser technology to measurement challenges. Sure, you can buy a decent laser level from a power tool brand, but when accuracy is key, it is good to know that your laser level was designed by a company that specializes in precision.