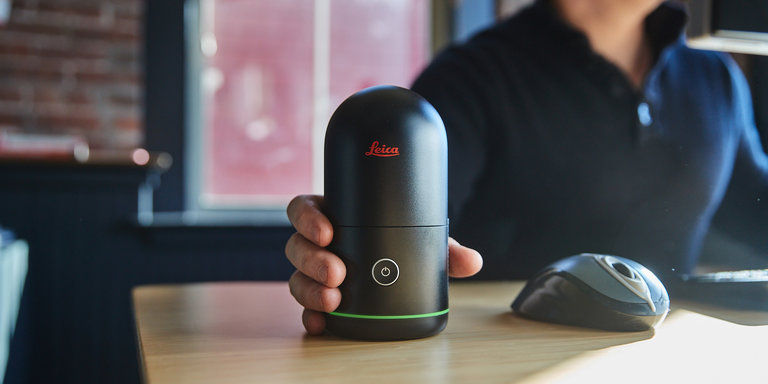
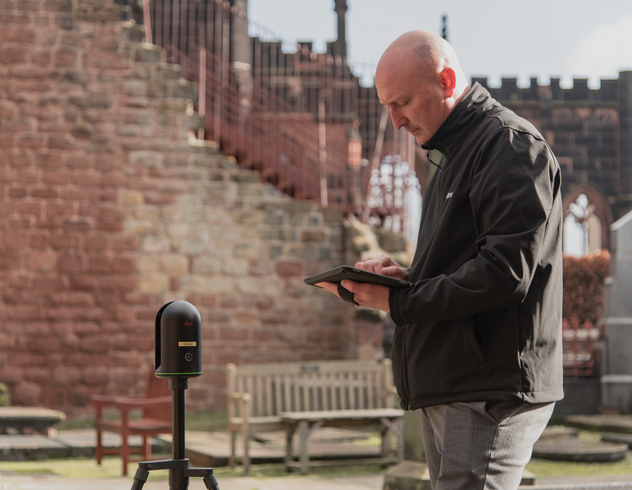
Your brand-new Leica BLK360 has arrived, and it’s time to get scanning — almost. First, there are a few steps you should take to ensure a smooth scanning process from unboxing to your first scans. Here’s a brief tutorial on how to set up your scanner — whether that’s the new BLK360 or the original BLK360 G1 — with maximum ease and minimum headache.
 Unboxing and inventory
First thing’s first. Remove all the items from the box and do a quick check to make sure everything’s there that you expected (this will vary depending on whether you purchased the module only, a Starter Pack, or any additional accessories). Not sure which BLK360 you have? If your BLK has a swing-door battery compartment, you have a G1; if it has a tab, you have a new BLK360.
Take a moment to admire the size and sleekness of the unit, marvel at its economy of form and function. Maybe take a selfie of yourself with it.
Or just, you know, set it down. We’ll come back to it.
 Charge your batteries
Since you will have just inventoried everything in your case, go ahead and plug in the included battery charger(don’t forget to remove the plastic cover) and begin to charge the batteries. This is basically step 1a. because you should charge all your batteries fully before using them in the scanner for the first time. This will ensure a long life for the batteries and keep your BLK360 happy (and you want to keep your scanner happy, don’t you?).
 Read the manual and familiarize yourself with the scanner
Unless you’ve removed it already, your scanner should be safely ensconced in its custom-molded BLK360 protective case. Leave it for a minute and read the Quick Guide and the Leica BLK360 User Manual. They’re full of helpful safety information, troubleshooting, and setup tips that should cover anything you don’t find here. RTFM as my father always said, which means Read the Full Manual (no, I’m not going to Google that, why do you ask?) and a sound piece of advice.
Now’s the time to take a closer look at the scanner itself. For the new BLK360 simply lift the unit out of its cushioning within the case. For the BLK360 G1, twist the bottom to unlock the protective case and lift the handle to remove the plastic dome. Examine the scanner, careful not to touch the cameras or the reflective mirrors (on the G1) or protective lasershield in the middle where the laser is housed. Find the battery port, then set it down.
 Update the firmware
Assuming your batteries are charged now, take the exceedingly boring but critical step of making sure the firmware on your device is up-to-date. Leica Geosystems’ engineers are always striving to improve our scanners even after they go to market, so it’s important to make sure the latest firmware is installed on the device to ensure smooth communication between the BLK360 and the applications it interacts with, as well as optimized scanning on the unit itself.
Here’s what to do:
-
Download the latest firmware update for your device from Leica Geosystems to your computer. If you have a G1, you will need to.
-
Insert a fully charged battery into the BLK360 battery slot.
-
Power the unit on by pressing the power button
-
If you’re using a new BLK360, you can connect your device to the computer by plugging in the USB-C cord from or by connecting to the device’s WLAN connection via your computer’s WIFI settings. With the BLK360 G1, there’s no cable port, so that’s WIFI connection only.
-
On your computer, open any internet browser and enter the following URL in the address bar to open the “Firmware Update” page:
-
For the new Leica BLK360 – 10.10.1.1(WIFI) or 192.168.42.1 (USB-C)
-
For the BLK360 G1: 192.168.10.90:8080
-
This will bring up an interface that allows you to attach the firmware update you downloaded. For the G1, you must extract the .zip file before uploading (it will be in an SWU file format); for the new BLK360 you can upload the .zip without extracting. Select and attach the file using the “Update Firmware” button.
-
A progress bar will show you how this update is going, and the BLK360 will blink yellow. After the upload completes, the sensor will flash yellow and green simultaneously, and the webpage will display a “Reboot Device” button. Go ahead and select that.
-
The device will now reboot and show a steady green ring, indicating that it’s ready for use.
If you need additional assistance, here’s a somewhat longer PDF guide with more visuals to help.
 Download and register your software
With the firmware updated and a fully charged battery installed, you could push the button and start scanning right away. And it would totally work! You can absolutely start scanning now and do the software part later, but since registering various accounts and licenses isn’t most people’s idea of a party, we suggest doing this first.
Depending on your setup, you might plan to be using any number of apps within our software ecosystem for your workflows, but right off the bat, you may want to download and install the:
-
BLK Live app* for iOS or Android on your smartphone and/or tablet
-
Leica Cyclone FIELD 360 app for your smartphone or tablet
-
Register for a free Cyclone Cloud account (you’ll need this to log into FIELD 360, among other things)
*Note: The BLK Live app is compatible with the new BLK360 only and is not supported on the BLK360 G1. For Android: Requires Android 10.0 or newer. For iPhone: Requires iOS 14.0 or newer.
The BLK Data Manager, FIELD 360, and BLK Live apps will give you control over various scanner settings, including the push button, and a way to export and manage your data files. REGISTER 360 will help you register your scans after scanning.
 Watch some tutorial videos
At this point, you might be desperate to practice scanning, so do this in any order, but we recommend watching some of our tutorial videos if you’re relatively new to the process. BLK Technical Specialist Andy Fontana has some good ones in this handy playlist. These short videos cover everything from scanning to registering your point clouds. Plenty to get you started.
 Set up your tripod and practice mounting the scanner
This part is pretty straightforward if you’ve ever put a camera on a tripod. If you’re using our BLK360 Tripod, make sure to fully extend and hand tighten all three of the telescoping legs, and extend the arms of the tripod until you hear a clicking sound. Then you can simply mount the scanner on top until it clicks and feels sturdy.
If you’re using your own tripod, you probably already know what to do with it. Just make sure you have a compatible BLK360 adapter for it.
 Initiate your first scan
Here we go — final moments. Press the power button on your BLK360. A blinking yellow light will come on, indicating startup, which will then switch to a solid green.
If you’re controlling the scanner via your smartphone or tablet app, now’s the time to connect those to the sensor. Open FIELD 360 or your BLK Live app and follow the instructions to punch in the serial number for your unit and the SSID of the onboard WIFI connection.
If you’re eschewing apps in favor of push-button scanning (because you’re a loose cannon, but darn it, you get results), go ahead and start scanning. Press the button again, and after a predetermined countdown time (the default is 10-seconds), the light will blink green.
Next, the unit will blink yellow while recording and then return to a solid green to indicate the scan is complete.
Now, you can move the unit to the next setup or crack a fizzy drink and pat yourself on the back — you’ve just completed your first BLK360 reality capture scan.
Want to learn more? Check out Laser Scanning Best Practices: The Leica BLK360.


