This is infrequently used content, but to expand accessibility to a wider audience we are using a machine for translation. Please excuse any unanticipated translation errors. -Thank you, Leica Geosystems.
Operation of Leica DISTO E7500i, also known as the D510, can be found in the following document (click here) and within the following user manuals:
- Leica DISTO E7500i FAQs (English only)
- User Manual Leica DISTO E7500i (English)
- User Manual Leica DISTO E7500i (Spanish)
- Quick Start Leica DISTO E7500i
- Leica DISTO E7500i (D510) CE conformity declaration
- Leica DISTO E7500i (D510) recycling passport
- Leica DISTO Self-Calibration (English only)
More information regarding the DISTO E7500i aka D510 displays below:
Switching ON and OFF
 |
|
 button for 2 seconds to switch off the D510. The D510 automatically switches off after 3 minutes of inactivity.
![]()
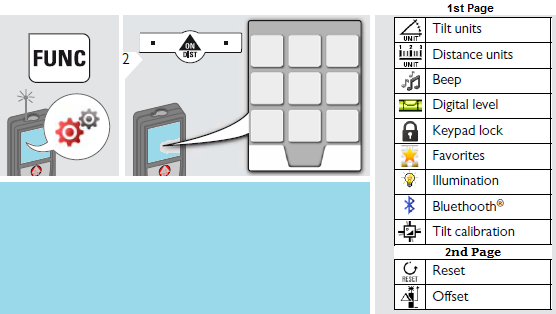
Display Overview of the Settings Page
|
|

Display Overview of the Functions Page
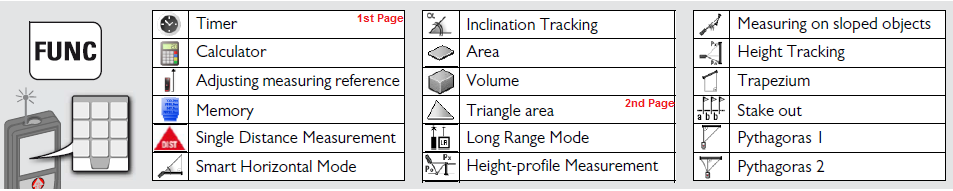 |
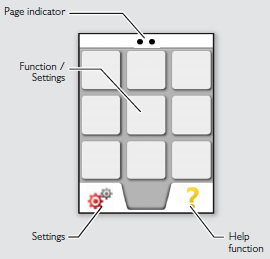
Basic Operations
![]()
Beep On/Off
Turn the beep on/off as per your convenience.
|
|
(**selection screen example for reference)
|

![]()
Digital Level On/Off
Use the inbuilt digital level as and when required.
 |
|
![]()
Display light/screen brightness
Adjust the screen brightness as required.
 |
|
![]()
Activate/de-activate keypad lock
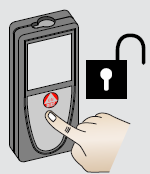 |
* Press How to unlock keypad Once the keypad lock system is activated, the device when switched on needs to be unlocked within 2 seconds after switching it on, or it will automatically switch off.
|
![]()
Memory
The device stores last 30 results by default.
|
![]()
Timer (Self trigger) or Auto release
Timer is used for self triggering the measurement once the laser is activated. The delayed release is recommended for precise aiming, e.g. for long distances, as it avoids shaking of the device while pressing the measurement key.
|
![]()
Calculator
|
![]()
Reset
Reset setting returns the device to its factory settings. All customization and stored memory is lost.
|

![]()
Offset
Offset setting allows you to add or subtract a set value automatically to or from all measurements.
|
Advanced Operations
![]()
Personalized favourites
 |
*Select your favourite functions and add them to your personal list. |
![]()
Activate/de-activate Bluetooth
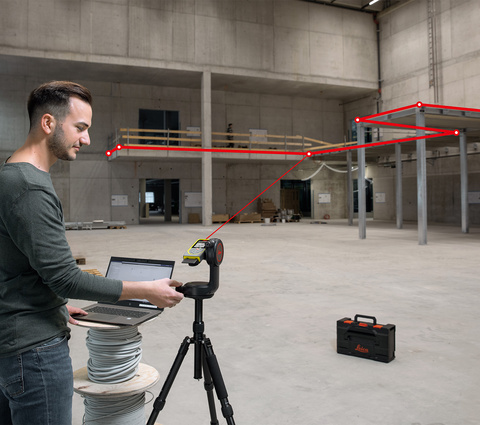
DISTO D510 includes Bluetooth® Smart (V4.0) capability that will allow it to automatically send measurements to your tablet or phone. Check out the Leica DISTO App Directory to see results on your Android, iOS or Windows devices.
 |
*Also Bluetooth switches off as soon as the laser distance meter is switched off. Leica DISTO sketch app
Download the Leica DISTO sketch app. from: iOS - https://itunes.apple.com/in/app/disto-sketch/id580422524?mt=8 |
![]()
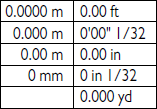
Changing distance Units
Leica Disto X510 is provided with the stock of units that you can change as per your requirement. Change from meter to feet to inches, per your convenience.
 |
|
![]()
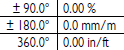
Changing Tilt Units
You can also change the Tilt unit setting as well to measure your triangle angles.
 |
|
![]()
Adjusting measuring reference/tripod
Custom your D510 to measure the distance from its front, rear, middle or the tripod thread of the device.
* Once the device is switched off, reference goes back to standard setting (i.e. rear of the device) |
 - Measurement from the front of the device,
 - Measurement from the tripod thread of the device.
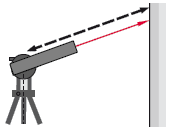 - Measurement from a Leica DISTO Adapter FTA 360.
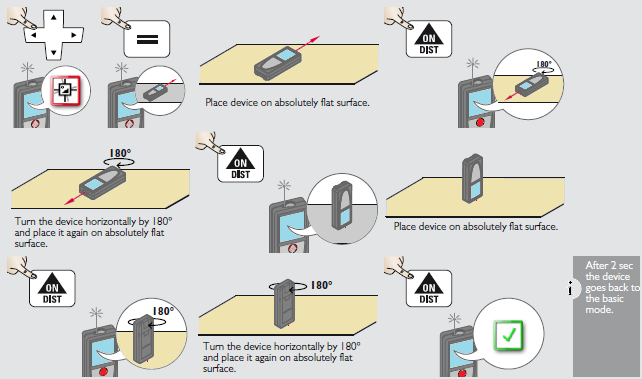
Adjusting/Standardising/Calibration of tilt sensor (Tilt Calibration)
|
Basic Device Applications
Straight line single distance measurement
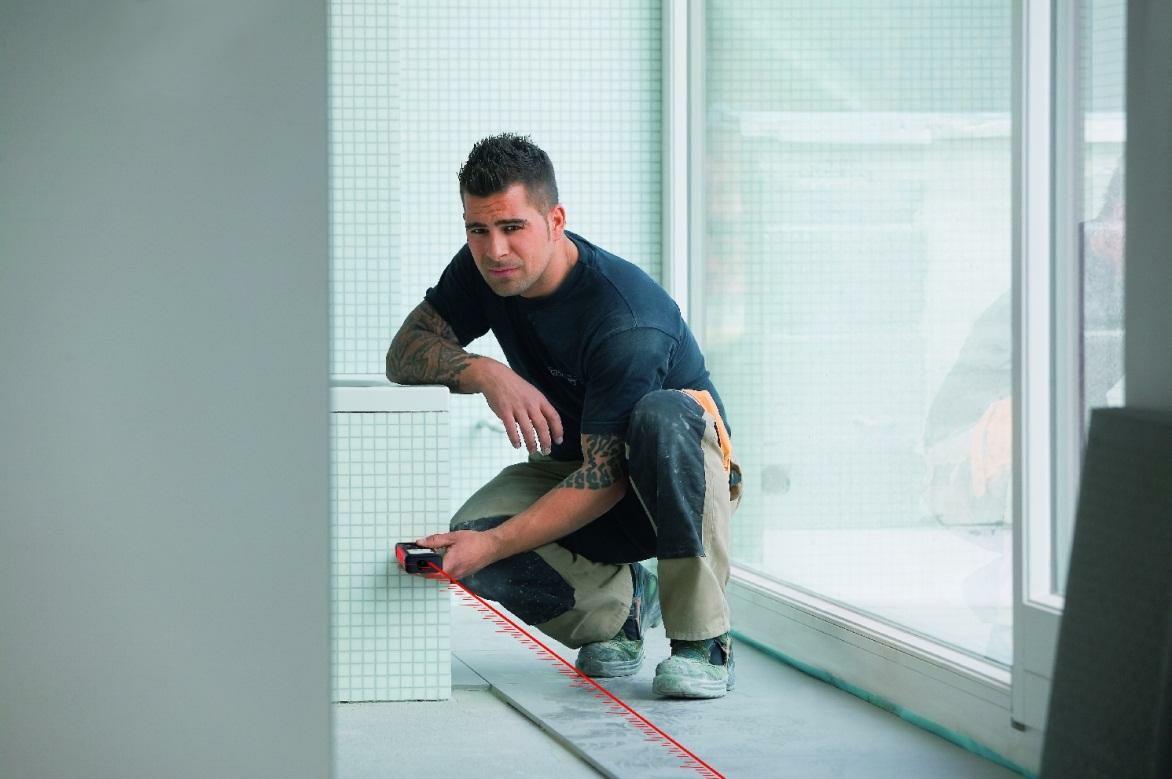 |
* For measurements, where there is nothing obvious at the other end for the laser to reflect back, it is recommended that you use Leica branded Target plate for maximum measurement range. |
![]()
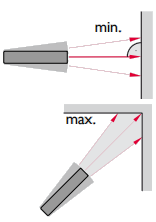
Permanent / Minimum-Maximum measurement
This function determines the minimum or maximum distance from a specific measuring point, e.g. the determination of room diagonals (maximum value) or horizontal distance (minimum value).
 |
|
![]()
Add/ Subtract function
 |
|
Point Finder / View Screen
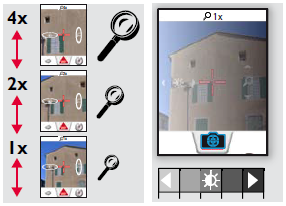 |
|
![]()
Area Measurement
Area measurement is a basic function provided in all Leica Disto devices. This helps you calculate the area of wall or surface just by measuring its sides from the same reference point.
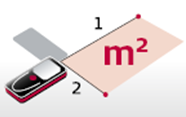 |
*In E7500i, you can also find the area application at the bottom left of the device as you switch it on.
* Adding and subtracting areas: |
Volume Measurement
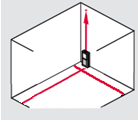 |
*Total linear distance (circumference) of the volume calculated The device also calculates: |
![]()
Triangular Area Measurement
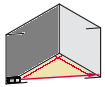 |
*Total linear distance (circumference) of the area calculated The device also calculates the Total linear distance or the circumference of object |
![]()
Smart Horizontal Mode™
A wonderful application to measure the horizontal distance even with an obstruction in the way.
 |
*Along with the horizontal distance this application also records angle of the tilt, length of the tilt and the vertical height from the device. |
![]()
Long range Mode
The long range mode allows measuring of difficult targets in unfavourable conditions such as bright light or extremely reflective objects.
|
![]()
Inclination Tracking
Inclination tracking helps you achieve the absolute 0° or 90° apart from finding the actual inclination of an object such as staircase railings; sloped floors etc. Ideal for horizontal and vertical adjustments.
|
Advance device Applications
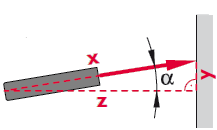
Sloped Objects
This function is used to measure the angle and length of a sloped object.
 |
The device automatically calculates, distance bewtween both points along with:
*This application requires tripod. |
![]()
Trapezium
This function helps you measure the detailed measurements of a Trapezium (an object whose 2 lengths are of 2 different sizes).
 |
The device automatically calculates, distance bewtween both points along with:
*This application requires tripod. |

Height Profile measurement
This function helps you measure the height differences between 2 or more reference points.
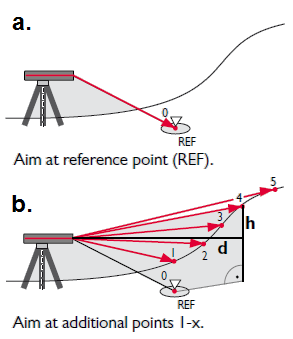 |
*You can repeat this process to measure the difference between more than 2 points. With each measuremen the device automatically calculates: |

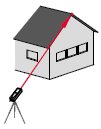
Height Tracking
Use this function to measure the height of an object from a distance. This especially works when you are measuring the height of buildings or trees, objects without suitable reflective points.
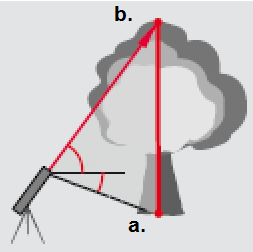 |
The device automatically calculates the height, between points a. & b. along with:
*The upper point can be targeted with the digital point finder and does not need a reflective laser target as the device only measures the inclination. |
![]()
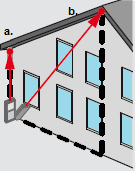
2 point indirect horizontal length measurement
This function helps you measure the length of an object indirectly just by focusing on 2 points.
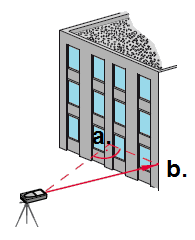 |
How to measure a. & b.
*This application requires tripod. |
![]()
3 point indirect horizontal length measurement
This function helps you in measuring the length of an object by focusing on 2 points.
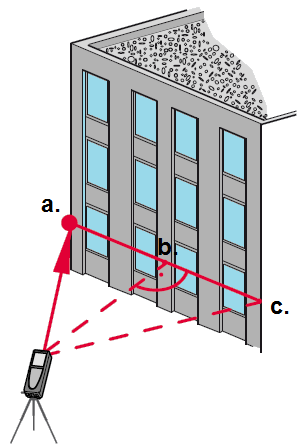 |
How to measure a., b & c.
*This application requires tripod. |